This guide is meant for beginners and provides a high-level overview of the Shopify store setup process. If you want to read in-depth on how to perform each step of the process, you can read the guide on how to create an ecommerce website from scratch, which will take you through some of the processes outlined below in great detail. You can also see why I recommend Shopify as an ecommerce platform if you want to read up on why Shopify beats the competition.
- Claim your free trial
First, navigate to the Shopify website or click on this link to claim a free trial, then $1 a month for three months. Enter your email address and click on “Start free trial”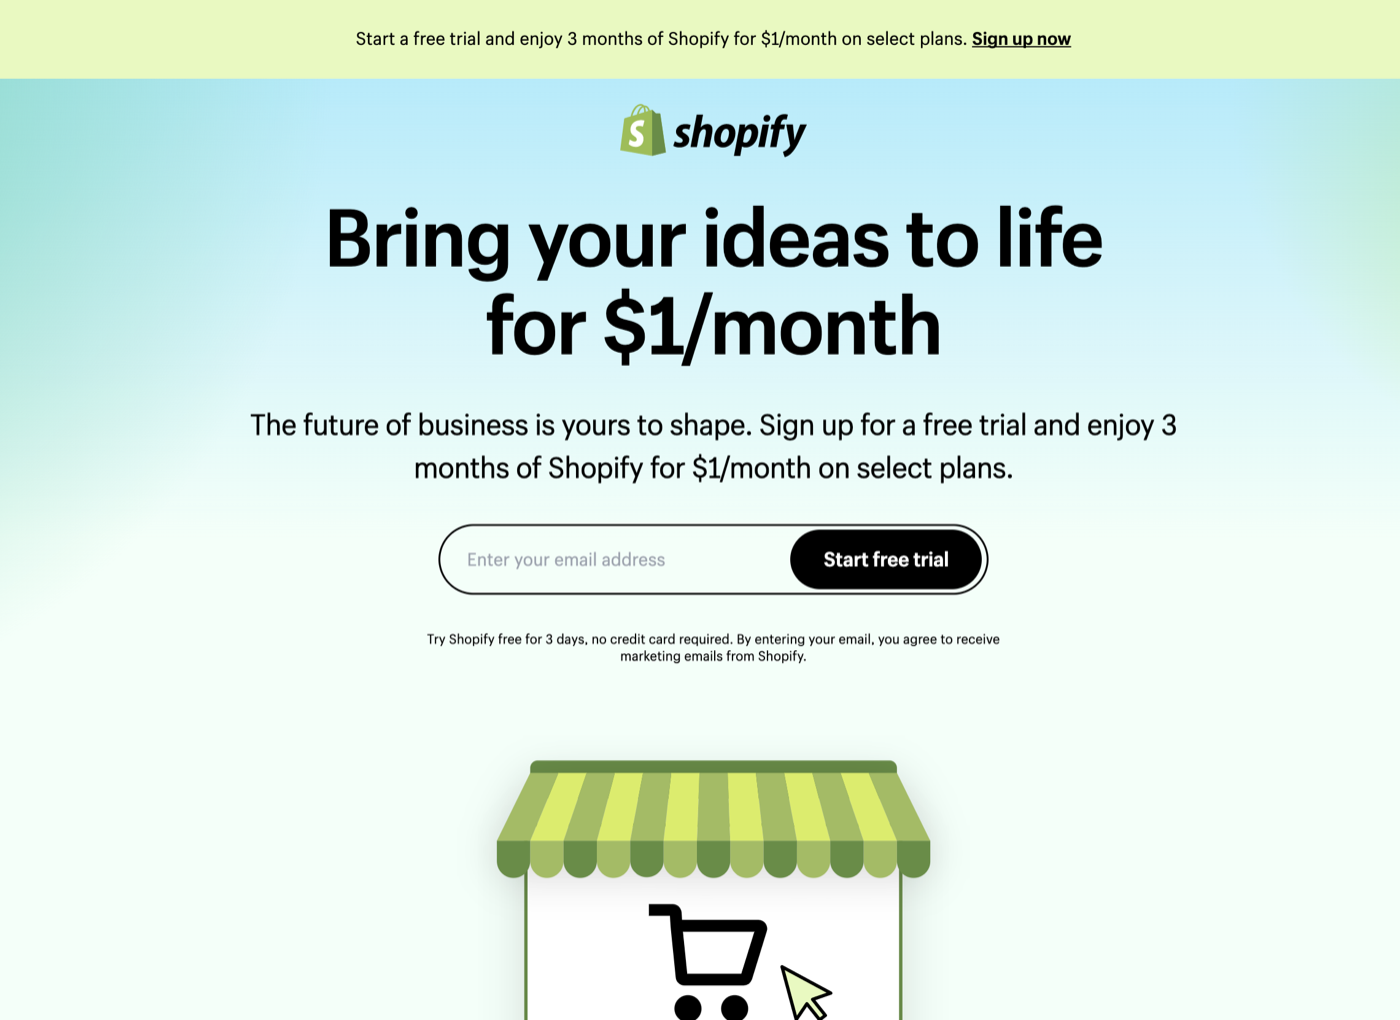
- Describe your business and answer the questionnaire
The next few pages will ask you to describe your business. You can skip these questions, but it’s recommended to fill out this information because it will help Shopify to deliver a better quality experience for you and other sellers. If you skip the question that asks “Where would you like to sell?” you might be limited in the number of features that are available to use, but you can always enable these features later. 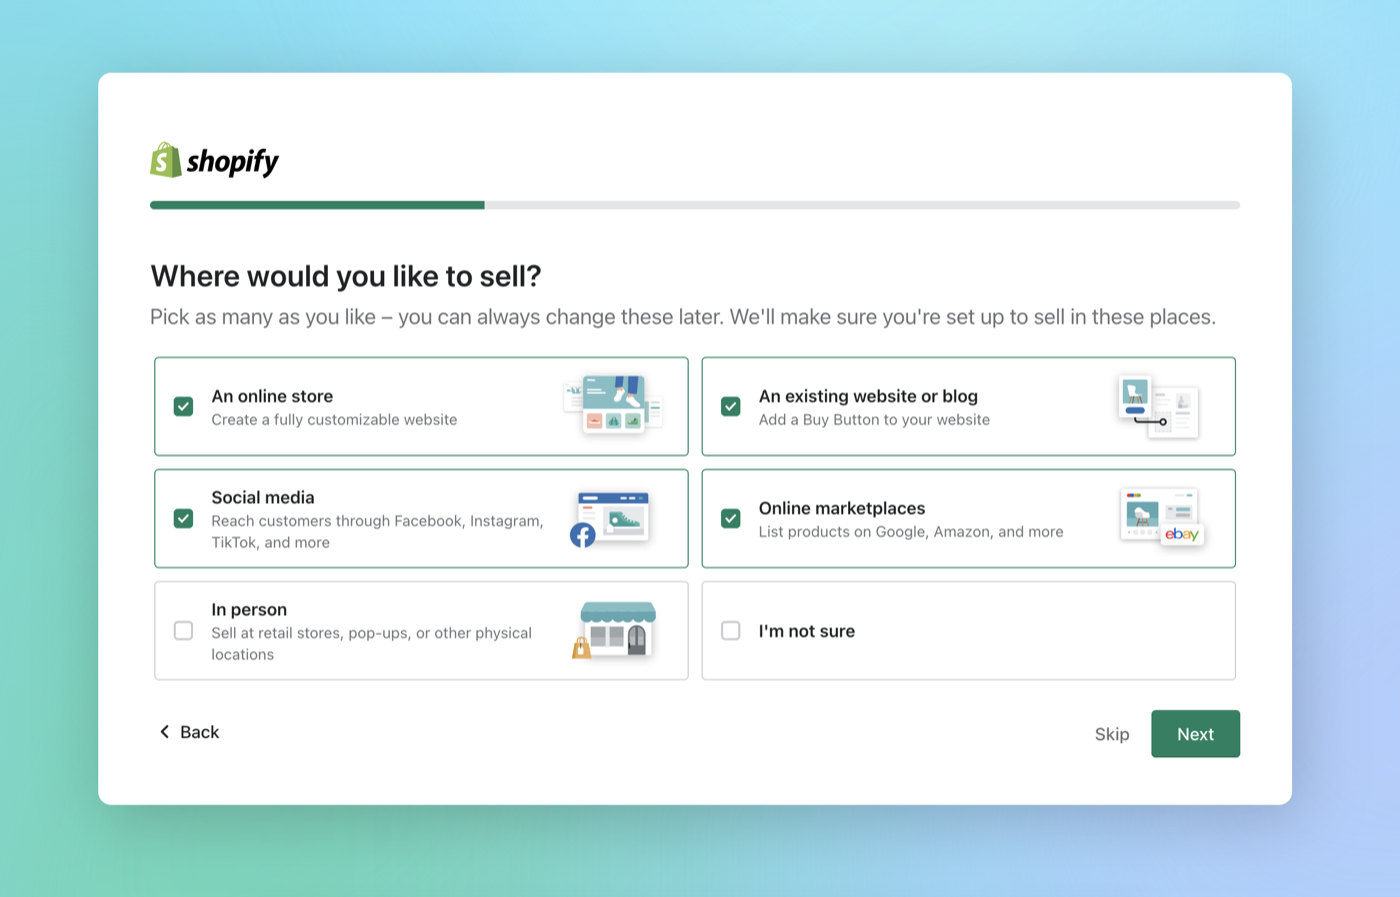
- Select a Shopify plan
Once you go through all of the setup questions you’ll be prompted to select a Shopify plan, which costs just $1 per month for three months. On the plan selection page, you’ll be able to compare the different plans and determine which one is best for your business. If you’ll have many staff accounts using your Shopify store, keep in mind that the Basic plan only allows for up to two staff accounts, which could make the upgrade to the “Shopify” plan worth it. Once you’ve selected your plan, navigate back to the Shopify admin Home page (https://yourstorename.myshopify.com/admin).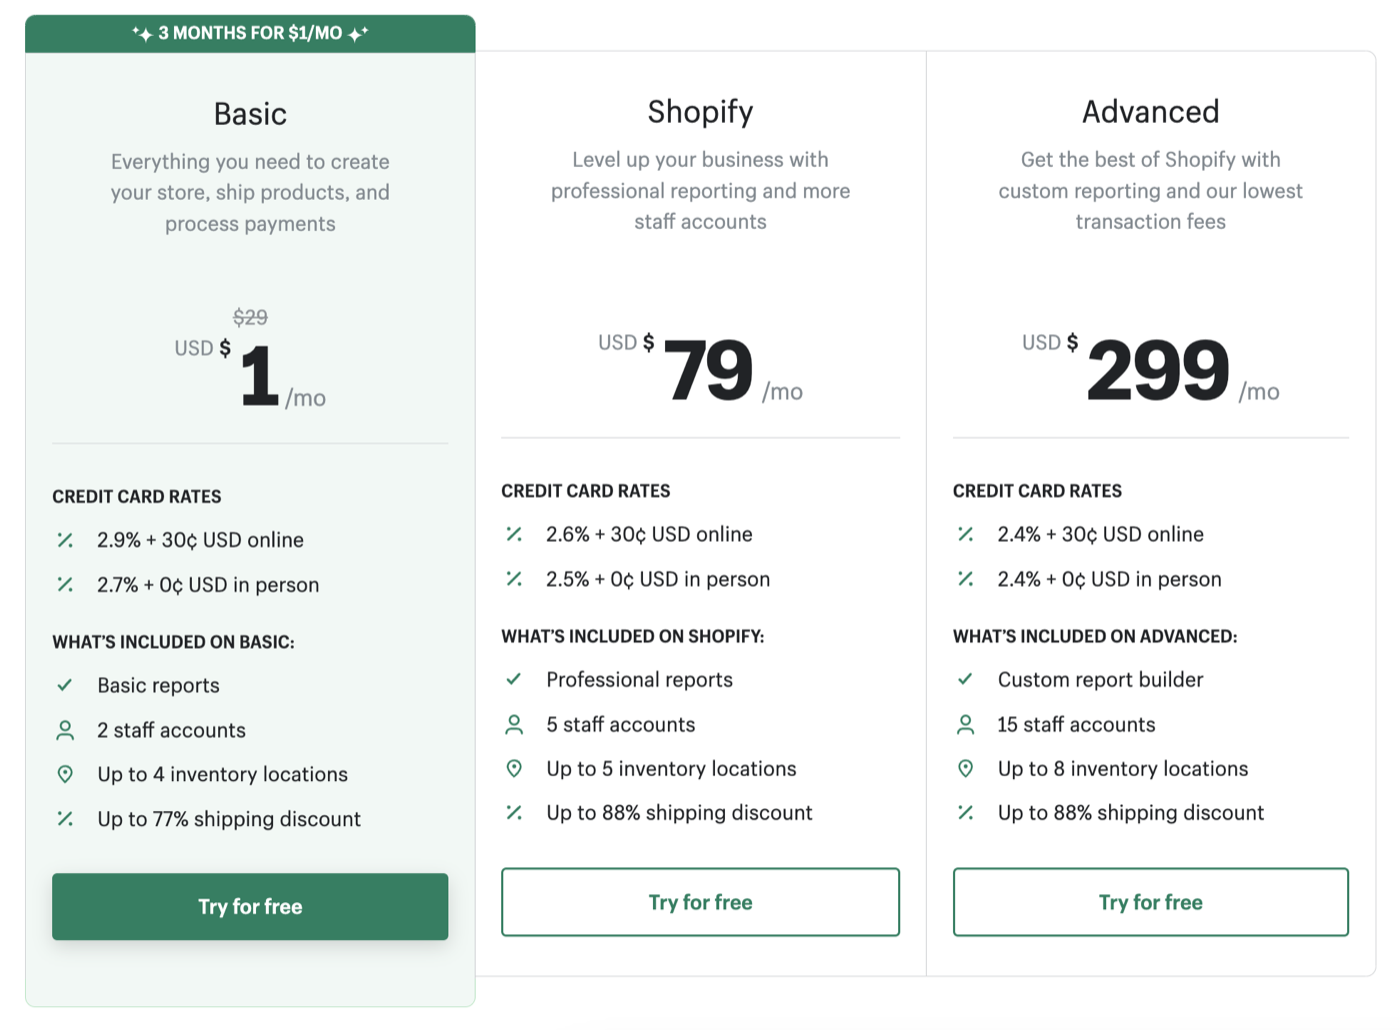
- Optional – Select Dropshipping Apps
If you’ll be dropshipping products on your store (e.g. only shipping products directly from the manufacturer after they are sold instead of having the inventory on-hand), there are a variety of dropshipping apps that you can install for your store. Click on the “Browse dropshipping apps” button and you’ll be directed to the Shopify app store. If you won’t be dropshipping, you can skip this step. 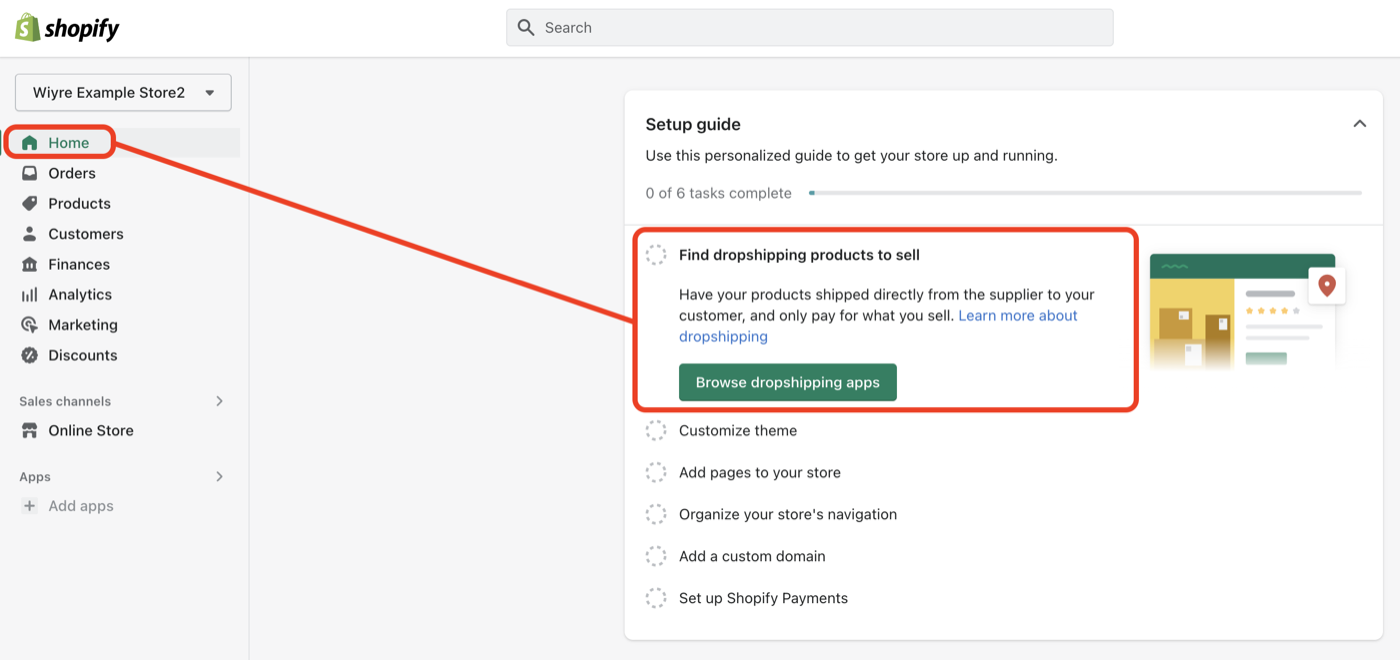
- Customize your store theme
Click on the “Customize Theme” button to see the current theme enabled on your store. To change the current theme, click on the green “Customize” button. If you’re an advanced user, you can customize the theme code by clicking on the three dots next to the “Customize” button and selecting “Edit Code”.
If you want to choose a new theme entirely, scroll down on the page and click on the “Add” button next to any of the popular free themes. For even more theme options, you can visit the Shopify Theme store. You can view your store with the changes you made to your theme at any time by clicking on the “View your store” button.
See Also: Our top picks for the best free Shopify Themes for your store.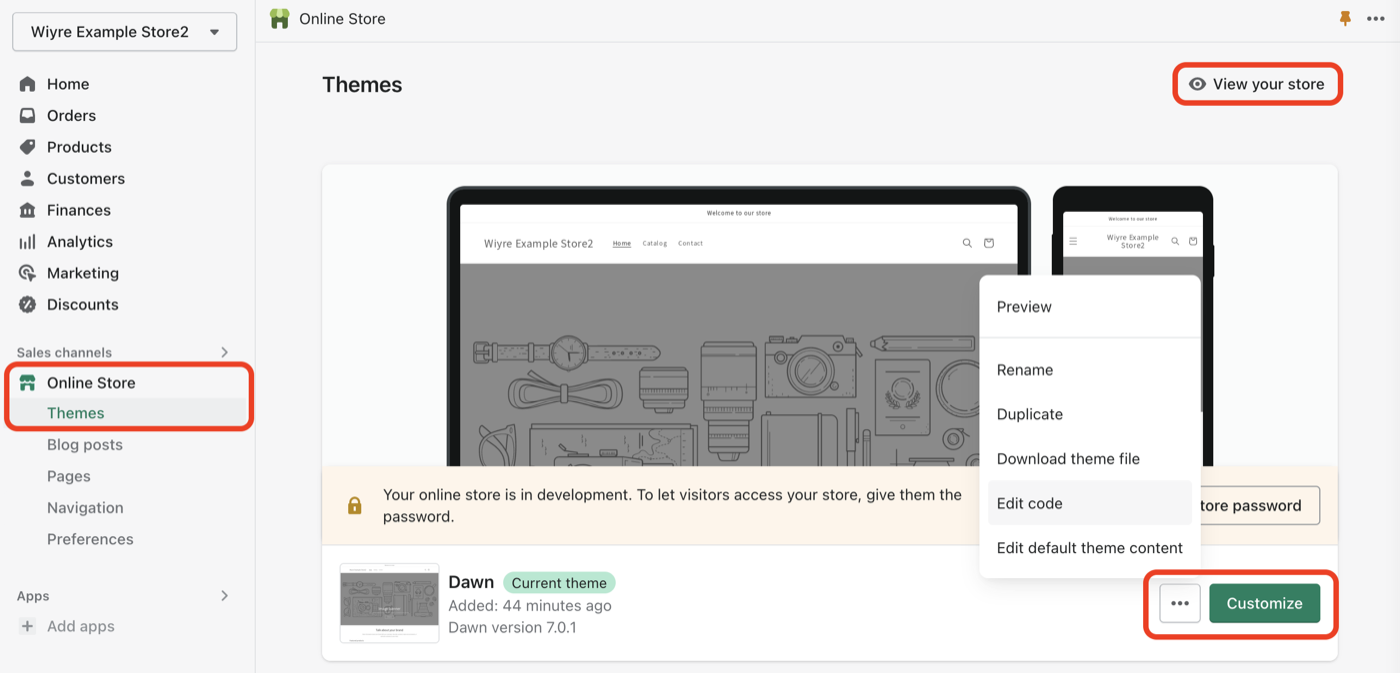
- Create “About Us” and “Contact” pages
To see pages on your store, simply navigate to the “Sales Channel” section on the left-hand side of the page, click on “Online Store”, then select “Pages”. From this page, you can see that a contact page has already been created for you.
To add more pages, click on the “Add Page” button. From this screen, you can enter a title, page content, and see what the page will look like in the search engine preview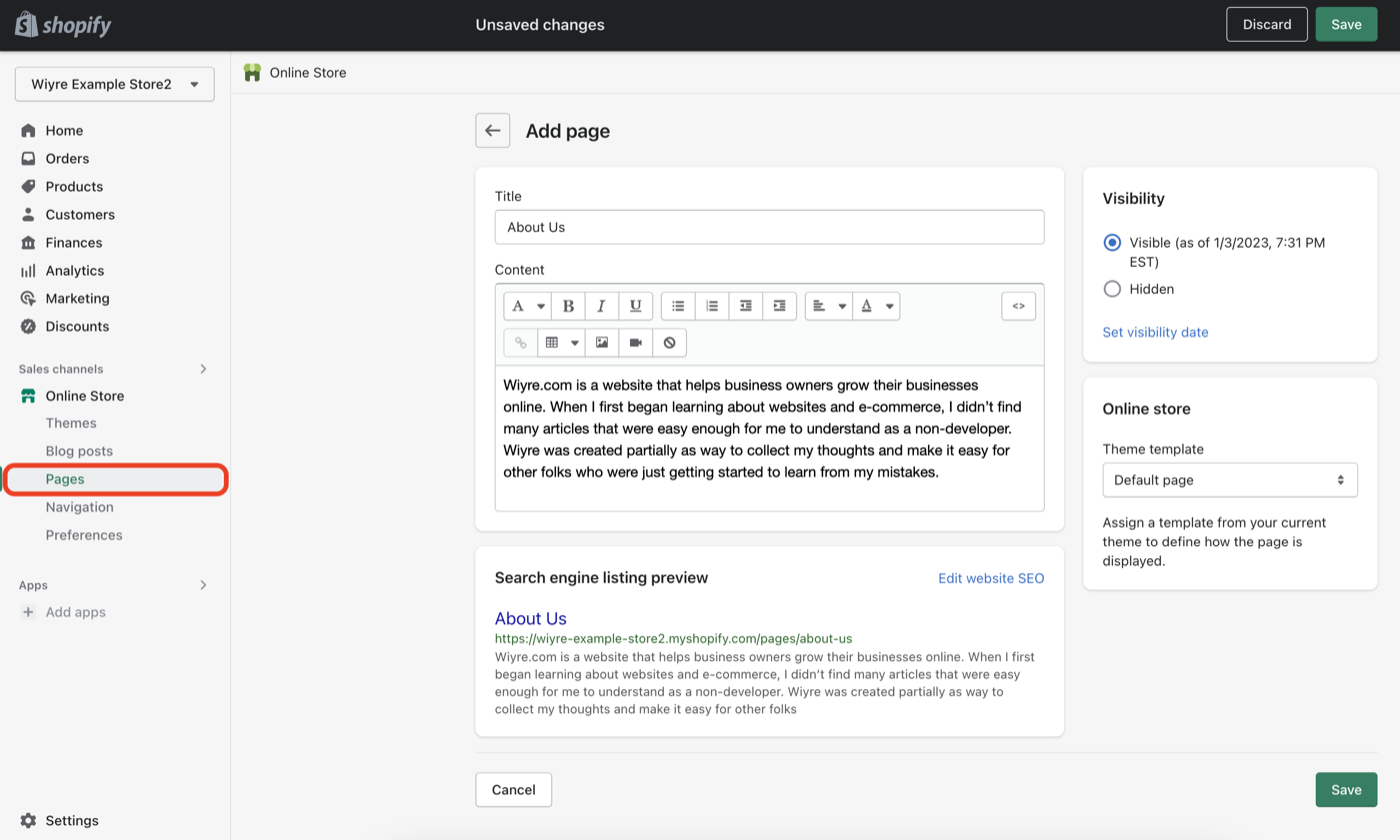
- Organize store navigation
Store navigation is classified as the menus (think: the header and footer links) and the collection and search filters. Collection and search filters allow your customers to find products based on color, size, price, and more. You can access the store navigation settings by navigating to the Sales Channel > Online Store > Navigation page. Navigation sets the stage for how you want visitors to browse your store, so it’s important to think thoughtfully about the link options you want to make immediately available to customers, and the links you want to put in a nested menu so it’s not the first option customers click.
For great tips and pointers on how to organize your menus, take a look at other popular Shopify stores for brands similar to yours, or theme template demos that are available in the Shopify theme store. 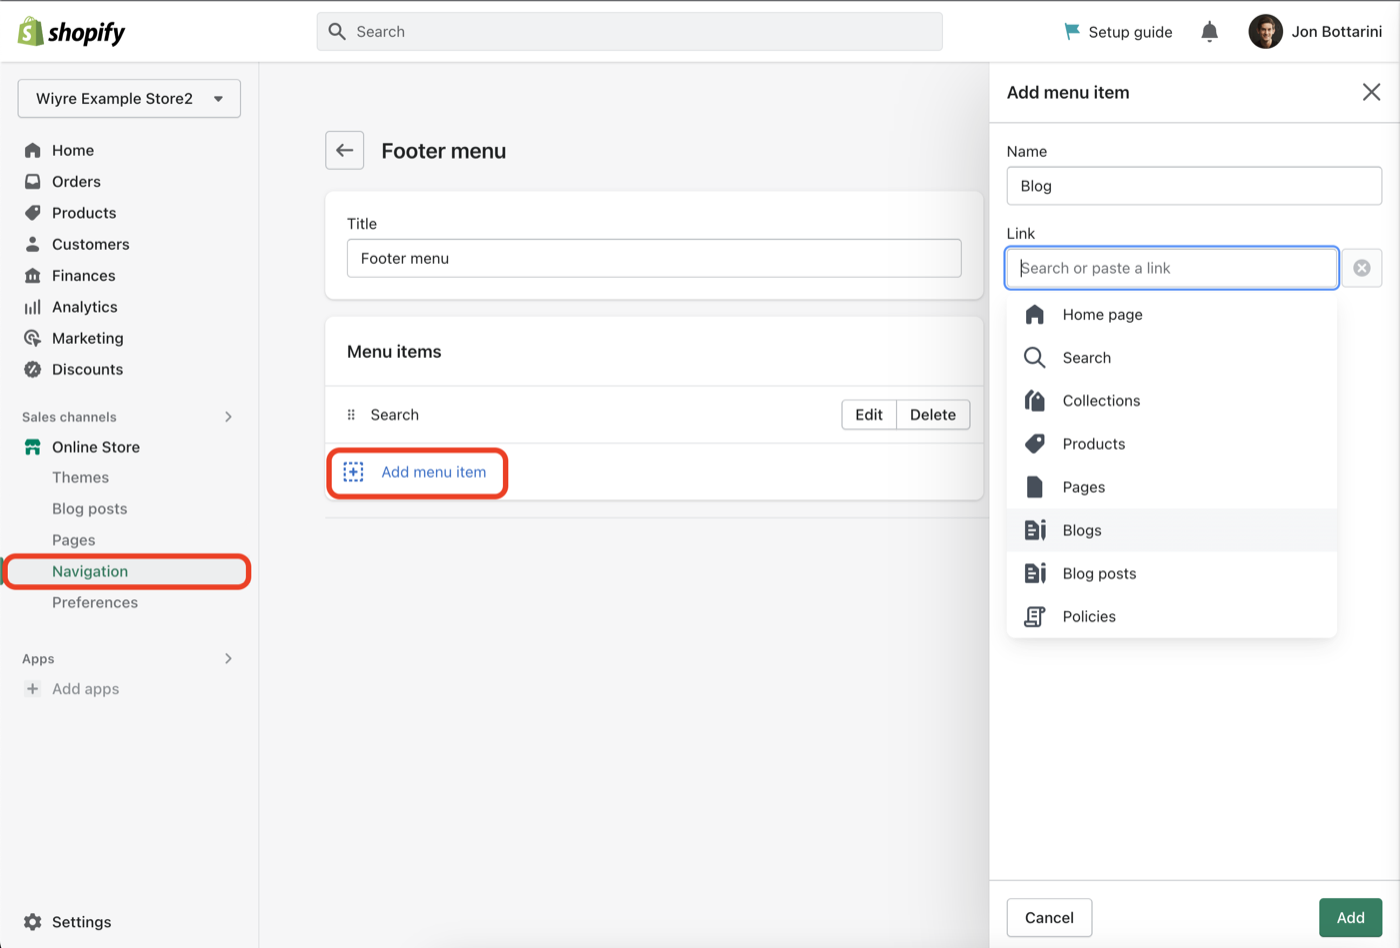
- Connect or purchase a custom domain
You can use the default Shopify store URL that is provided when you first create your store (it looks like this: example.myshopify.com). The problem with doing this is that it’s unprofessional, and a domain name is very affordable (to the tune of about $10 per year according to the latest domain renewal prices).
A custom domain establishes a brand for your store. If you want your own custom domain name for your Shopify store, you can purchase a domain on Shopify, or you can purchase a domain on a third-party domain registrar like NameCheap, usually for a cheaper price, and link it to your Shopify account. I’ve covered exactly how to do this, step by step, in the tutorial video here. 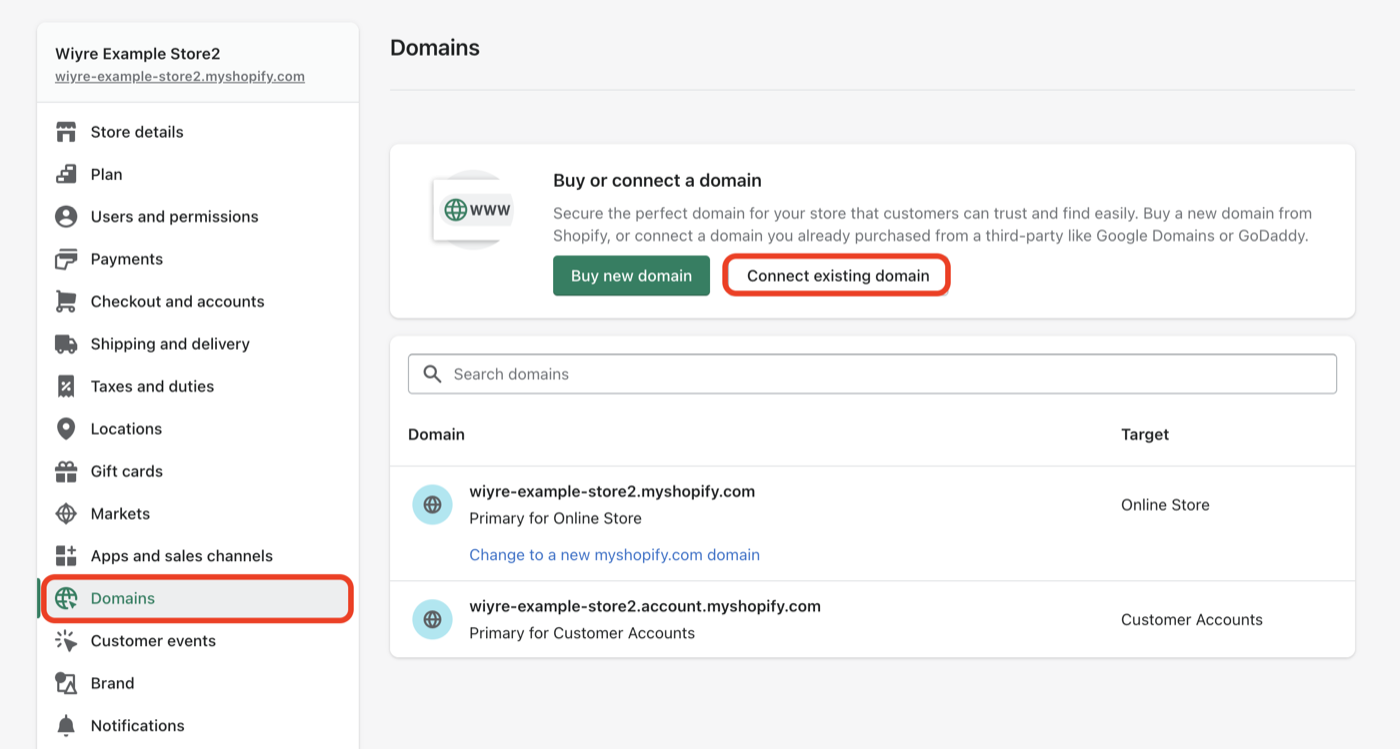
- Configure your store to accept payments
The easiest and quickest way to accept payments is Shopify payments, which charges you 2.9% of the total cost of the item you’re selling (plus shipping costs), in addition to $0.30. You’ll find that other payment processors such as PayPal and Stripe charge a similar amount. Before you can enable Shopify Payments, you’ll first need to provide additional information about your business, such as the type of business you have and the location of the business as well.
It’s recommended to have more than one payment processor in case one provider doesn’t accept a customer’s credit or debit card. For this reason, I usually go with Shopify Payments and PayPal. If a card is not accepted by either of these services, it’s a very high likelihood that it could be fraudulent, and in that situation, you don’t want the person to complete the purchase anyway. 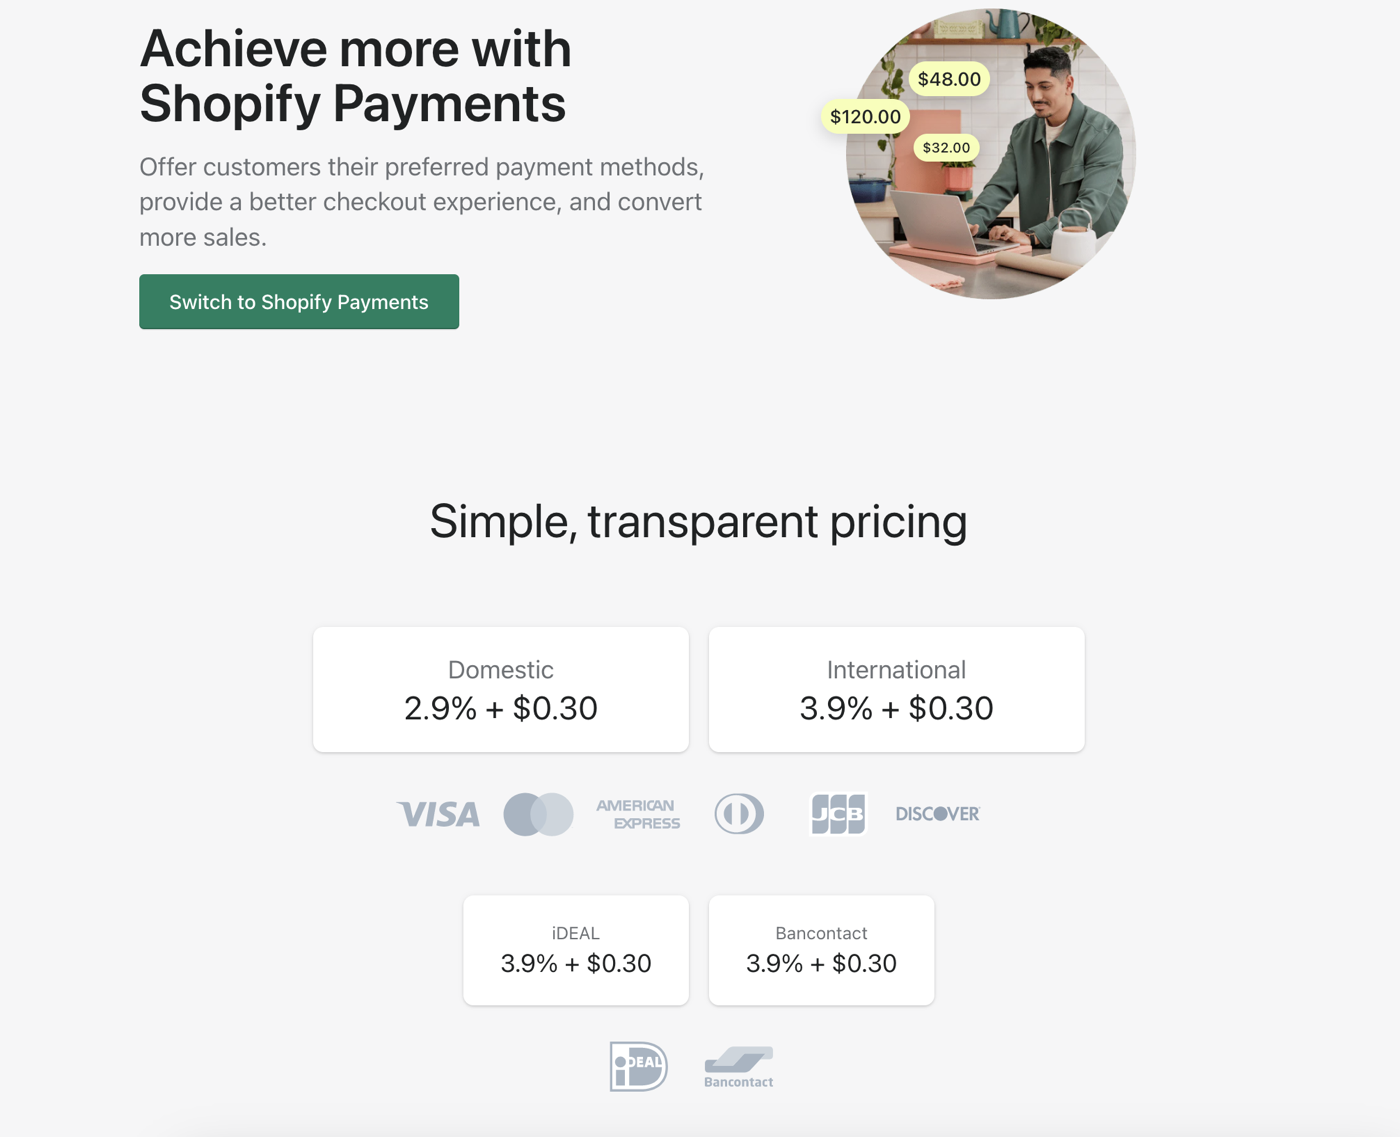
- Add your first product
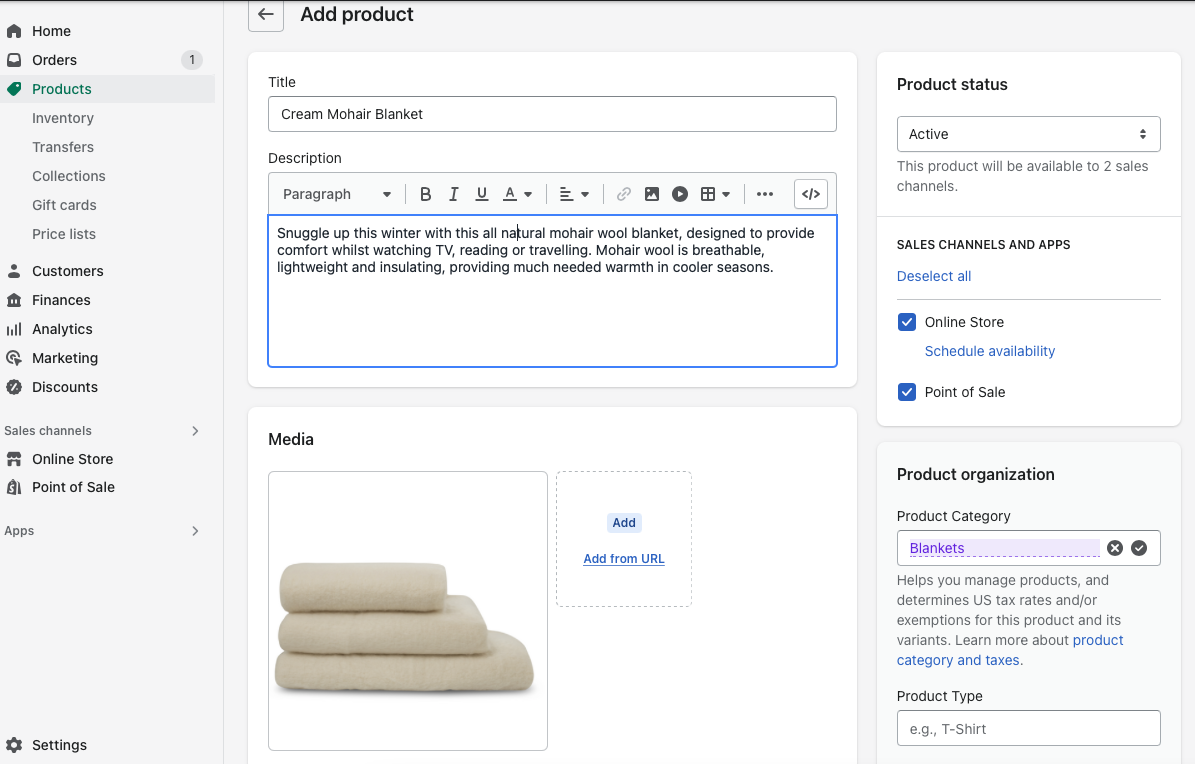
If you already have products that you’re ready to sell, navigate to the products page Sidebar > Products or navigate directly to https://example.myshopify.com/admin/products/new. Once you’re here, click on the “Add your products” button and you’ll be taken to the add product page.
On this page, there are a lot of options, including the ability to add photos, categories, prices, and inventory. If you’re just starting out, try creating a test product just to go through all the options and understand how they all work. Keep in mind that this is one of the most important parts of your store – you should include enough detail about each product and spend a lot of time on these product listings.