

What better way to understand what your audience is looking for than to ask them directly? Surveys and polls give you valuable insight into what your audience cares about most, and allows you to make data-driven decisions from the results of your survey.
Surveys and polls are a wonderful tool to better understand your audience’s shifting requirements and perceptions. There are several ways to design surveys and gather responses from your audience, and Mailchimp makes the process easy and accessible. Below you will find a step-by-step rundown on how to create a Survey or a Poll in Mailchimp.
Time needed: 30 minutes
Setting up a survey or poll is easy and much of the process is a simple click-and-select process. We’ll go into each step below step by step.
- Navigate to the “Create Survey” section in Mailchimp
Login to Mailchimp and navigate to the Audience section, click on Surveys then Create Survey

- Add custom questions to your survey
From here it should be possible to add custom questions to your survey. Click the Add a section option and it will bring up the question builder.
- Add additional questions and answer types
Now it’s time to choose an answer type based on how you want your customers to respond. An introduction is used to provide text, image, or video that conveys information regarding your survey. You can easily add an image or copy and paste a link to a video hosting platform such as Youtube and it will embed in the survey. This is an excellent way to add a personal touch and works like a text content block so it doesn’t require a question.
- Include radio buttons for specific one-answer questions
There are also radio buttons that enable you to create multiple-choice questions that allow only one answer. To add more answers, you simply click on the plus icon or the minus icon then remove it.
- Add questions with checkboxes
Another question type that you can use in your survey is a checkbox that allows the user to create a multiple-choice question for multiple answers, similar to the radio button option. You simply enter the answer in a text field.
- Add branding to your survey or poll
Now that we have a good mix of questions we are ready to style the form to fit the particular brand. After selecting Continue To Design you can select Branding and add your personal logo, and if you have a paid plan with Mailchimp, you can opt to have the Mailchimp logo removed.
- Use Custom Messaging to add and edit descriptions
You can click on Custom Messaging to add and edit descriptions, change the submit button and update any confirmation messages. You can also add a closed survey message and an error message for required questions.
- Modify the poll with your own custom style
Under Styles, you can edit the survey background and button colors.
- Review your survey
Once you are happy with the results, you can select Review to continue to the review page for the settings you have selected. Here you are able to edit the name of your survey to give it a title. These settings are for internal use and are only accessible for the person setting up the survey, therefore it won’t be visible to any of the respondents. From here you can select your audience based on your preset audience settings, and if you are sending the campaign via a Mailchimp campaign automation, you would select the audience you want new contacts to be subscribed to. You must ensure that the audience has an email field in order to subscribe to new contacts.
- Select toggle options
You also have a few toggle options. By selecting a daily summary you will get a daily email summarizing the new respondents to your survey
- Finalize and share your survey
Once done, you can click on Continue and your survey is live. The time has come to promote it, with a few options for sharing. You can share the survey in a campaign or automation, which creates a link to add a Mailchimp email, campaigns, and automations. This is recommended for one-off surveys or recurring surveys. You can also select Share Anywhere which creates a link to send via your website, text chat, or non-mailchimp emails.
With this option, anonymous responses will be tracked if the respondent’s email was requested. It works well for internal employee feedback, website feedback, order forms, chatbots, or when adding new contacts. Lastly, you can also share on Facebook or Twitter, and these options will draft a post link with a link to the survey.


Mailchimp Survey & Poll Customization Options for Questions
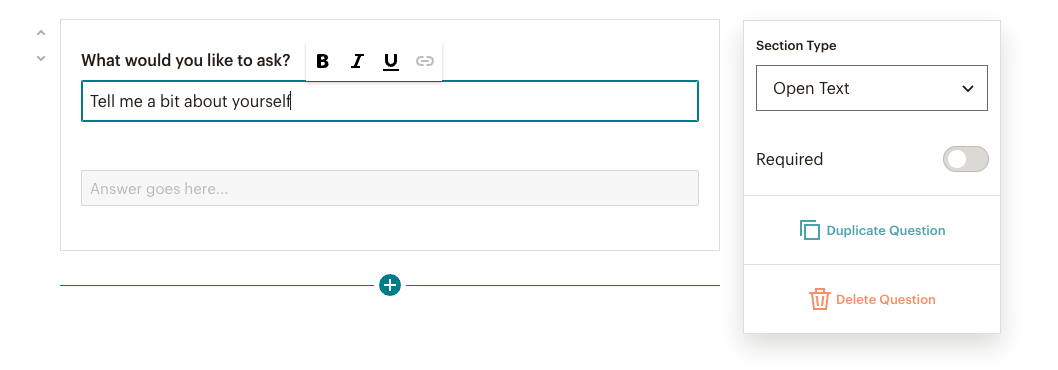
On the right side of the survey builder there is a sidebar where you can modify and customize question settings. The options available might appear different depending on the question type that is selected. To change the question type you can make the question required or toggle the other option slider to let users fill in their own answers before the last answer choice.
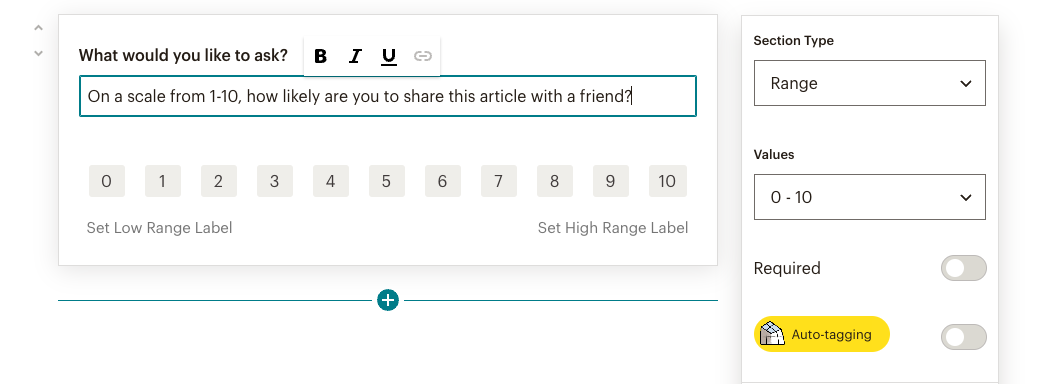
It is also possible to enable auto-tagging, which is used to apply tags to contacts based on their response. You must share the survey through Mailchimp email campaign automation or add new contacts through the survey for tags to apply. Survey auto tagging does not apply with the Share Anywhere anonymous link unless you add an email question type (for more information on Share Anywhere see step 11 above). It is also possible to duplicate a question or delete it in its entirety.
What survey question types are there?
There are many different types of questions you can ask in your survey. An example of a few of the question types is shown below. For a full list of question types, see this list.
One question type is the Open Text section type. Respondents will see a text field that allows them to fill in their answers.
With Range you can display numbers, stars, emojis, and hearts on an adjustable scale.
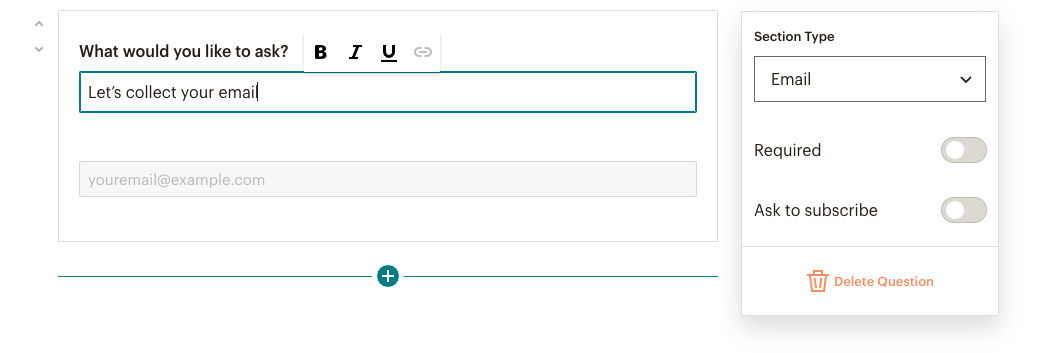
The Email field allows you to ask respondents for their email addresses if they’re not already subscribers. This will allow you to identify and tag respondents in your audience or ask them to subscribe to your emails.
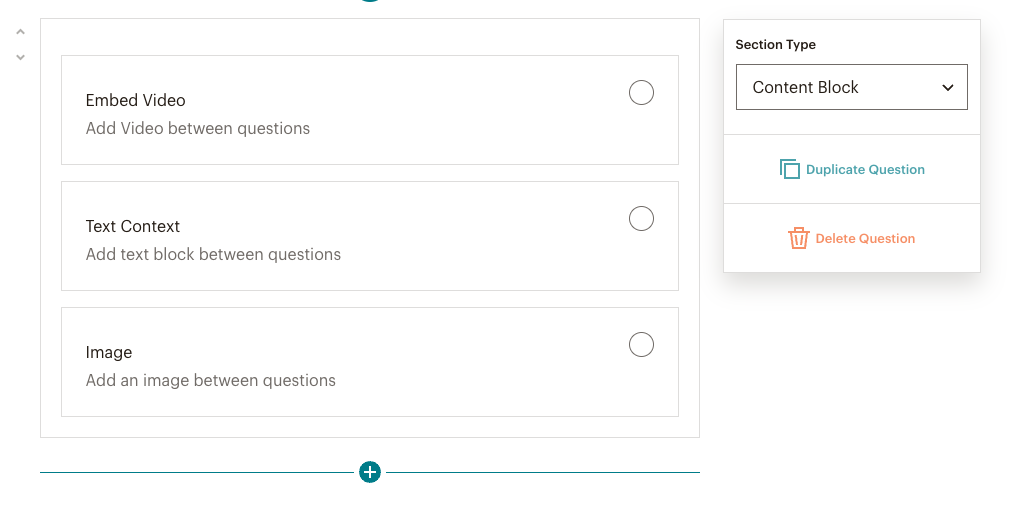
You can also choose a Content Block where you can add text in between questions or at the end of the survey.
Frequently Asked Questions
How do I insert an image in a Mailchimp survey?
When on the Questions part of your survey, you should select Content Block as your Section Type. This will allow you to add images to your survey (kindly refer to point (9) above).
How do I insert the survey inside a campaign email?
- Ensure you are at the Content section of the campaign builder, then select Edit Design.
- In your layout, select the text content block where you wish to include a survey.
- Include your survey in the editor by either typing or pasting the question.
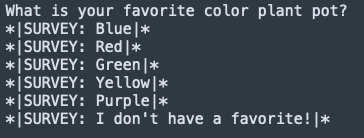
- Type the *|SURVEY:|* tag into the editor after the survey question, with the response you want after the colon using a separate *|SURVEY:|* merge tag for each response.
- Click Save & Close
For more information on how to customize a survey within an email, see this guide.
How can I set the end date for a survey or poll?
The only way to end a survey or poll is by manually ending the survey by toggling the turn on/off slider, or by clicking on the Audience drop-down and selecting Surveys. If you have more than one audience, click the Current audience, and select which of your audience selection you wish to edit. Check the box for the survey you wish to end/remove and click on Delete.
How can I specify the audience for a survey or poll?
Navigate to the Audience and click on Surveys then Create New Survey. From here you are able to select the relevant audience for a specific survey. To create an audience follow the below steps:
- Click Audience then Audience Dashboard
- Select the Current audience drop-down and click View audiences
- Click Create Audience and select Create Audience in the confirmation box
- Enter the details required in each field
- Review Contact information for audience
- In the Form Settings, opt-in for your audience and complete the email information.
- Click Save.
You may also like:
-
Mailchimp vs. Klayvio – Which Email Marketing Solution Is Best?
If you’re looking to send email marketing campaigns to your audience, you have a lot of options to choose from. The top contenders for email marketing are Mailchimp and Klayvio. We’ll take a deeper look at the features of each solution, understand the pricing options, and give a few suggestions to see which service is…
-
How to Import Contacts to Mailchimp
Have a bunch of contacts that you want to start emailing? Mailchimp allows you to import and store contact information, such as name, email address, location, and much more. Once you import your contacts to Mailchimp you can begin to send campaigns and segment your subscribers for different marketing purposes. Contacts can be found and…
-
8 Essential Shopify Apps to Drive More Sales (2023 Guide)
As a business owner, you know how important it is to stand out from the crowd and increase your visibility in the marketplace. Shopify, one of the world’s most popular eCommerce platforms, offers an abundance of tools and integrations that could make your business marketing and growth as simple as possible. Haven’t set up a Shopify…
