

Have a bunch of contacts that you want to start emailing? Mailchimp allows you to import and store contact information, such as name, email address, location, and much more. Once you import your contacts to Mailchimp you can begin to send campaigns and segment your subscribers for different marketing purposes. Contacts can be found and managed in your Audience section from your Mailchimp dashboard. There are four different ways to go about this:
- Import contacts manually through the web application
- Import contacts from a 3rd Party Service
- Import Contacts via CSV File Upload
- Import contacts via Copy and Paste
Mailchimp Contacts Overview: The free plan of Mailchimp includes up to 500 contacts, the Essential Package is limited to 50,000 contacts, the Standard package allows up to 100,000 and the Premium plan allows for up to 200,000 contacts. If you realize your needs exceed the 200,000 contact limit threshold, you can contact Mailchimp to arrange a custom package that will suit your requirements.
How to Add Contacts to Mailchimp Manually
To manually add contacts to your Mailchimp audience lists you can follow these steps:
- On your Mailchimp Dashboard, select Audience, then All contacts.
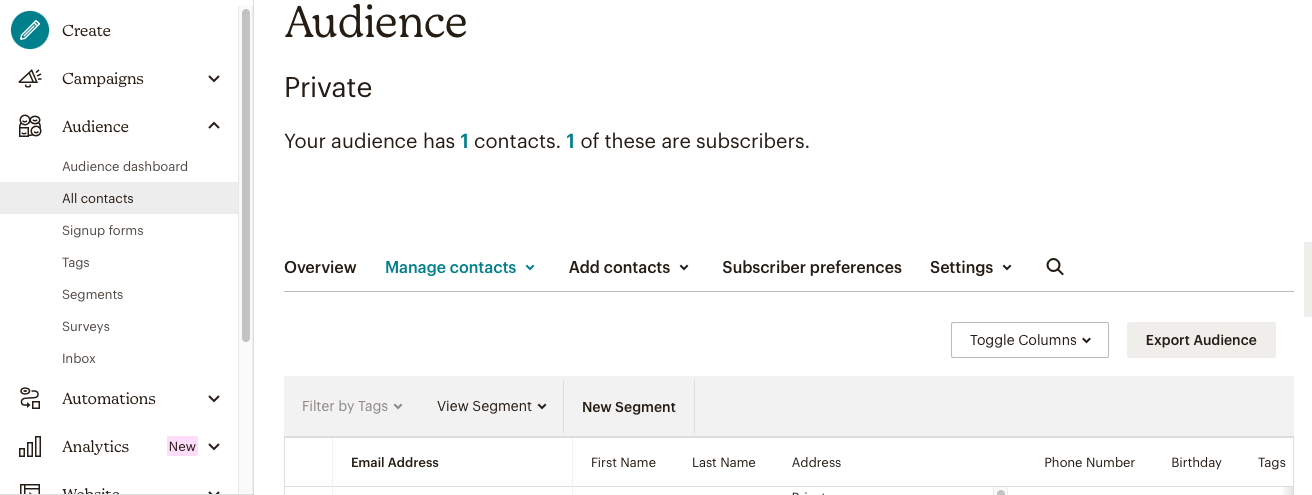
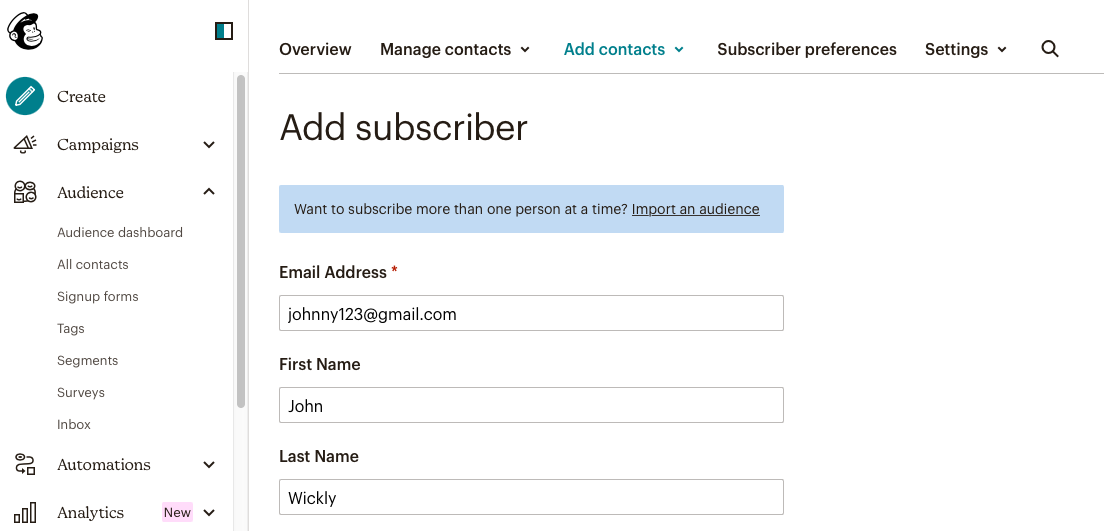
- From here you can select Add Contacts then Add subscriber which will bring up a manual form to populate which will include contact information, name, address, birthday, phone number, and other relevant information of the contact you wish to add. Once finished, complete the process by clicking on the Subscribe button at the bottom of the page.
How to Add Contacts to Mailchimp from a 3rd Party Service
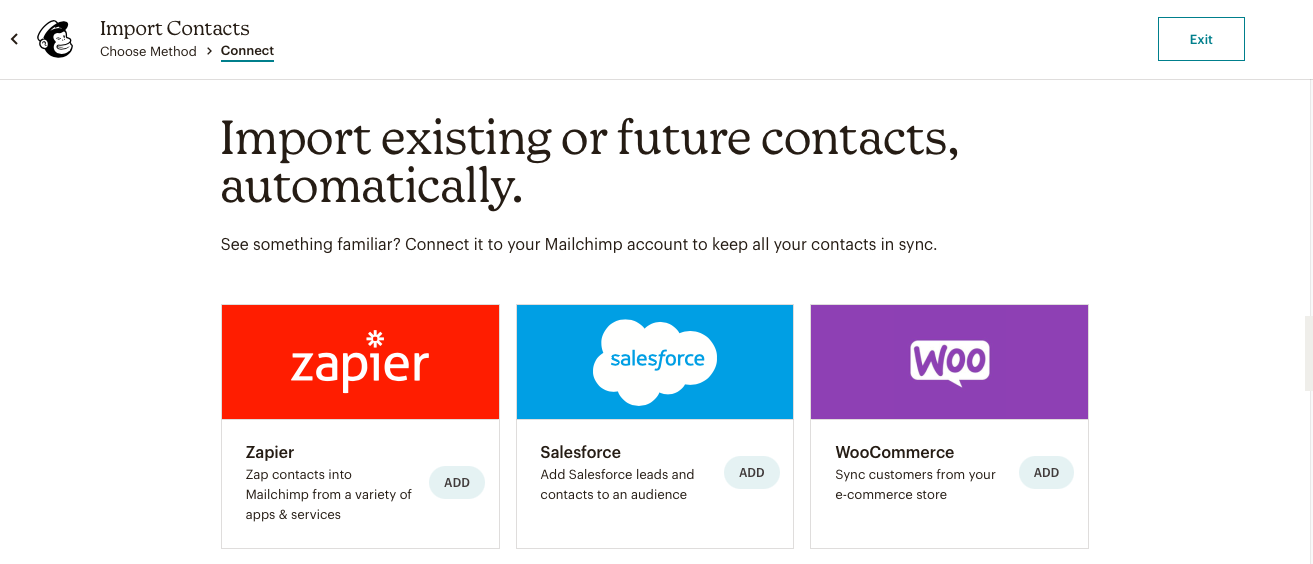
Currently, the only services that support contact importing directly into Mailchimp are:
- WooCommerce
- Zapier
- QuickBooks Online
- Salesforce
- Squarespace Commerce
- Shopsync
To import contacts from one of these apps into Mailchimp, follow these steps:
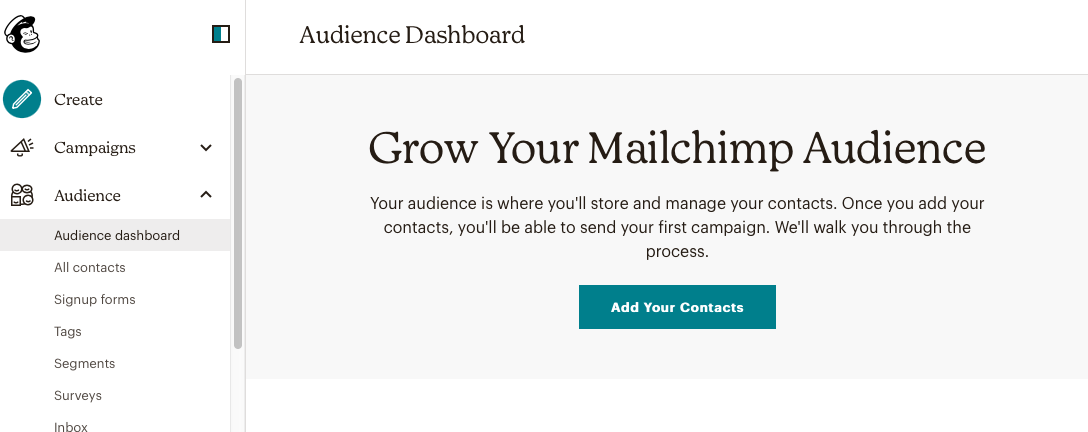
- From your Mailchimp Dashboard, select Audience, then Audience Dashboard.
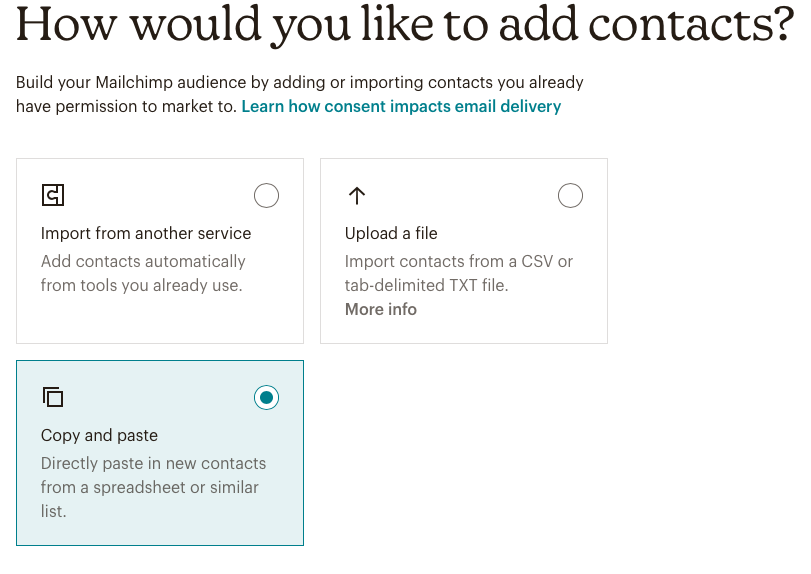
- Select Add your contacts and then Import from another service then click Continue.
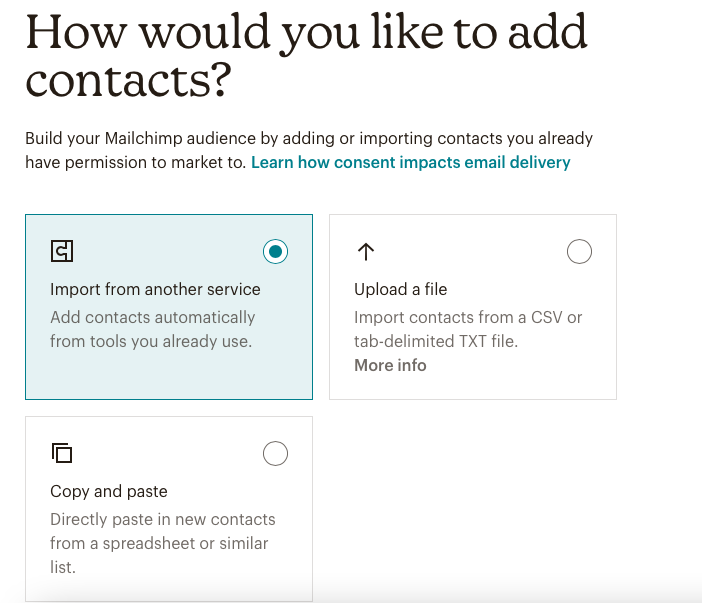
- From there you can select one of the integration tiles, linking you to the service you wish to import your contacts from, and click Add. Once you have finished uploading your contacts select Done.
Import Contacts via CSV File Upload
Time needed: 5 minutes
How to import contacts from a CSV file
- Login to Mailchimp
From the Mailchimp Dashboard, select Audience, then Audience Dashboard.
- Format your contacts correctly in a spreadsheet
It is important to ensure that your .csv file is formatted correctly so that the uploading process does not skip over important information or return an error code. The below screenshot is an example of exactly what Mailchimp required in terms of formatting.

- Select the Upload a file option
Select Add your contacts then choose the Upload a file option and click Continue.
- Browse and select contacts
Select Browse in the “Upload your contacts” window to access the files stored on your hard drive, and select the file you wish to upload and extract the contacts from.
- Organize Contacts
Once you have uploaded your CVS click on the drop-down arrow and select, Subscribed, Unsubscribed, Non-Subscribed, or Cleaned. You also have the option of updating any existing contacts already in your audience which will replace existing contact information with new data from the import.
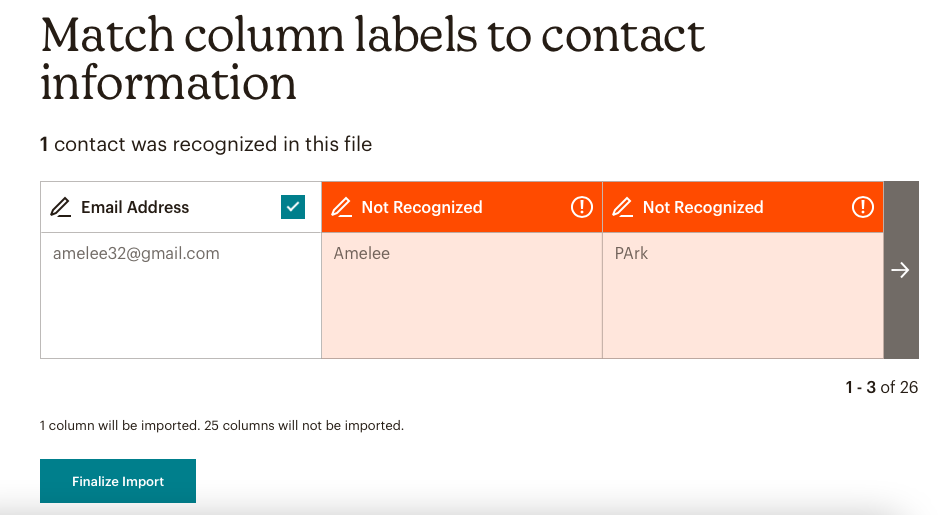
- Match column labels and tags
The next steps involve tagging the contacts with tags you’ve already created or by using popular tags such as Influencer, Member, Staff, etc. The final step requires you to match column labels to contact information. Columns that can be selected in this field include email address, first name, last name, combinations of types of addresses, birthdays, phone numbers, IP addresses, tags, languages, marketing permissions, and more.
- Complete import
Once completed, Review your Report, and if you are satisfied, click on Complete Import, and you are all done. Now you can start your first marketing campaign!


Import contacts via Copy and Paste
- On your Mailchimp Dashboard, Select Audience then select Audience Dashboard.
- Click on Add your contacts and then Copy and Paste.
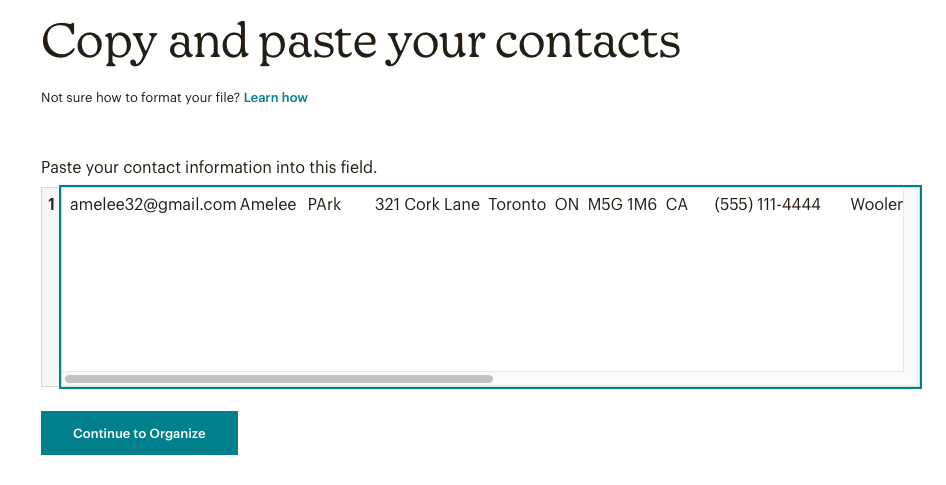
- Copy and paste the information of the contact you wish to subscribe in the box provided, then click on Continue to Organize.
- Once you have uploaded the information, click on the drop arrow down and select – Subscribed, Unsubscribed, Non-Subscribed, or Cleaned. You also have the option of updating any existing contacts already in your audience which will be replaced with data from the import.
- Add the relevant tags and click on Continue to Match.
- From here you would be required to edit the information copied so that Mailchimp recognizes the column name, based on the contact name, address, contact information, etc. Any information not matched to the relevant column will not be imported and it is therefore important that all the information is reviewed for accuracy.
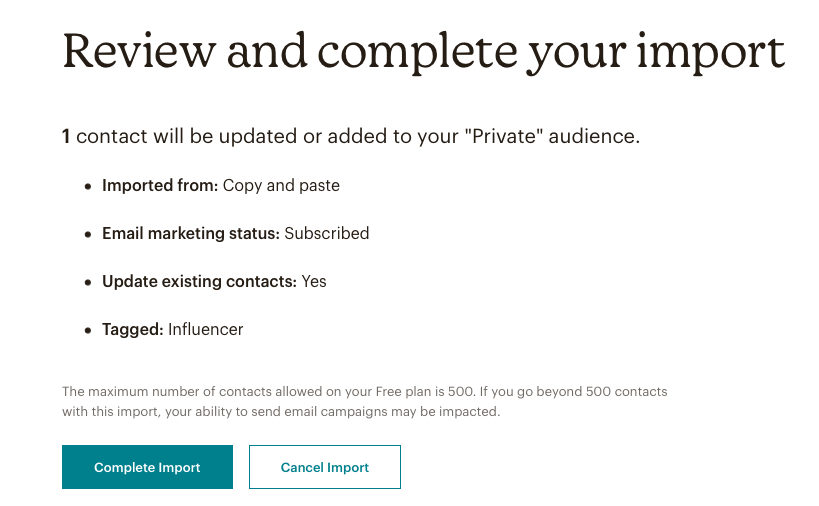
- Once you have matched all the relevant information, review and complete your import by clicking on Complete Report.
Conclusion
Importing contacts to Mailchimp is a straightforward process. All contact imports are done from the Mailchimp dashboard and are a simple click-and-select, easy-to-use process. Be sure to properly tag your contacts, check that the information they have provided matches the information that has been uploaded, and the rest will take care of itself. After importing all the contact information you can map the fields of your audience and after a few clicks, your contacts can automatically be imported into Mailchimp.
Frequently Asked Questions
As of 29 August 2022, the free plan allows users to have 500 contacts (before then users were limited to 2,000).
Mailchimp automatically detects potential duplicate contacts when you upload a list, update a contact, or add a contact manually. When it finds a duplicate, it combines the two records into one and keeps the most complete data. It will also remove duplicate records if they don’t have any useful information. Should you add someone who is already in your audience, you will be prevented from uploading to avoid duplication.
Mailchimp has a wide range of segmentation options to customize your audience and your targeted marketing campaigns. A full list of segmentation options can be found on their official website.