Mailchimp allows you to configure SPF and DKIM records to authenticate your custom domain. You can still send emails without authenticating your domain, but some major email service providers (like Gmail or Yahoo Mail) may mark your emails as spam if you don’t have the proper SPF & DKIM records. Adding these records and authenticating your domain cuts down on spammy email senders (and malicious users who want to send on behalf of a domain they don’t own!). In this article, we will walk through the process of setting up SPF and DKIM records on your domain in Mailchimp from start to finish.
What is SPF?
SPF stands for “Sender Policy Framework”. A SPF record is a piece of text that is added to your DNS records, that specifies what SMTP servers can use your domain to send emails. This prevents someone from sending an email using your domain without your authorization. Having a SPF record might improve your servers’ reputation, and allow your emails to reach your recipients more often (instead of ending up in the Spam folder, or not being allowed to be sent at all).
What is DKIM?
DKIM stands for DomainKeys Identified Mail. It’s a very important DNS record that prevents an email from being modified while in transit. A DKIM record creates a “signature” for your emails and identifies the sender, it validates that the email being sent from one computer to another is not altered form the time you click send, to the time the email arrives in the recipient’s email inbox.
How Do I Set Up SPF & DKIM records in Mailchimp?
Prefer watching a video on how to set up these SPF & DKIM records in Mailchimp? Check out the video below to see the entire process step by step.
Time needed: 10 minutes
By setting up SPF & DKIM records, you will have successfully authenticated your domain and pass SPF, DKIM, and DMARC checks when sending emails.
- Login to your Mailchimp Account and navigate to the “Domains” setting
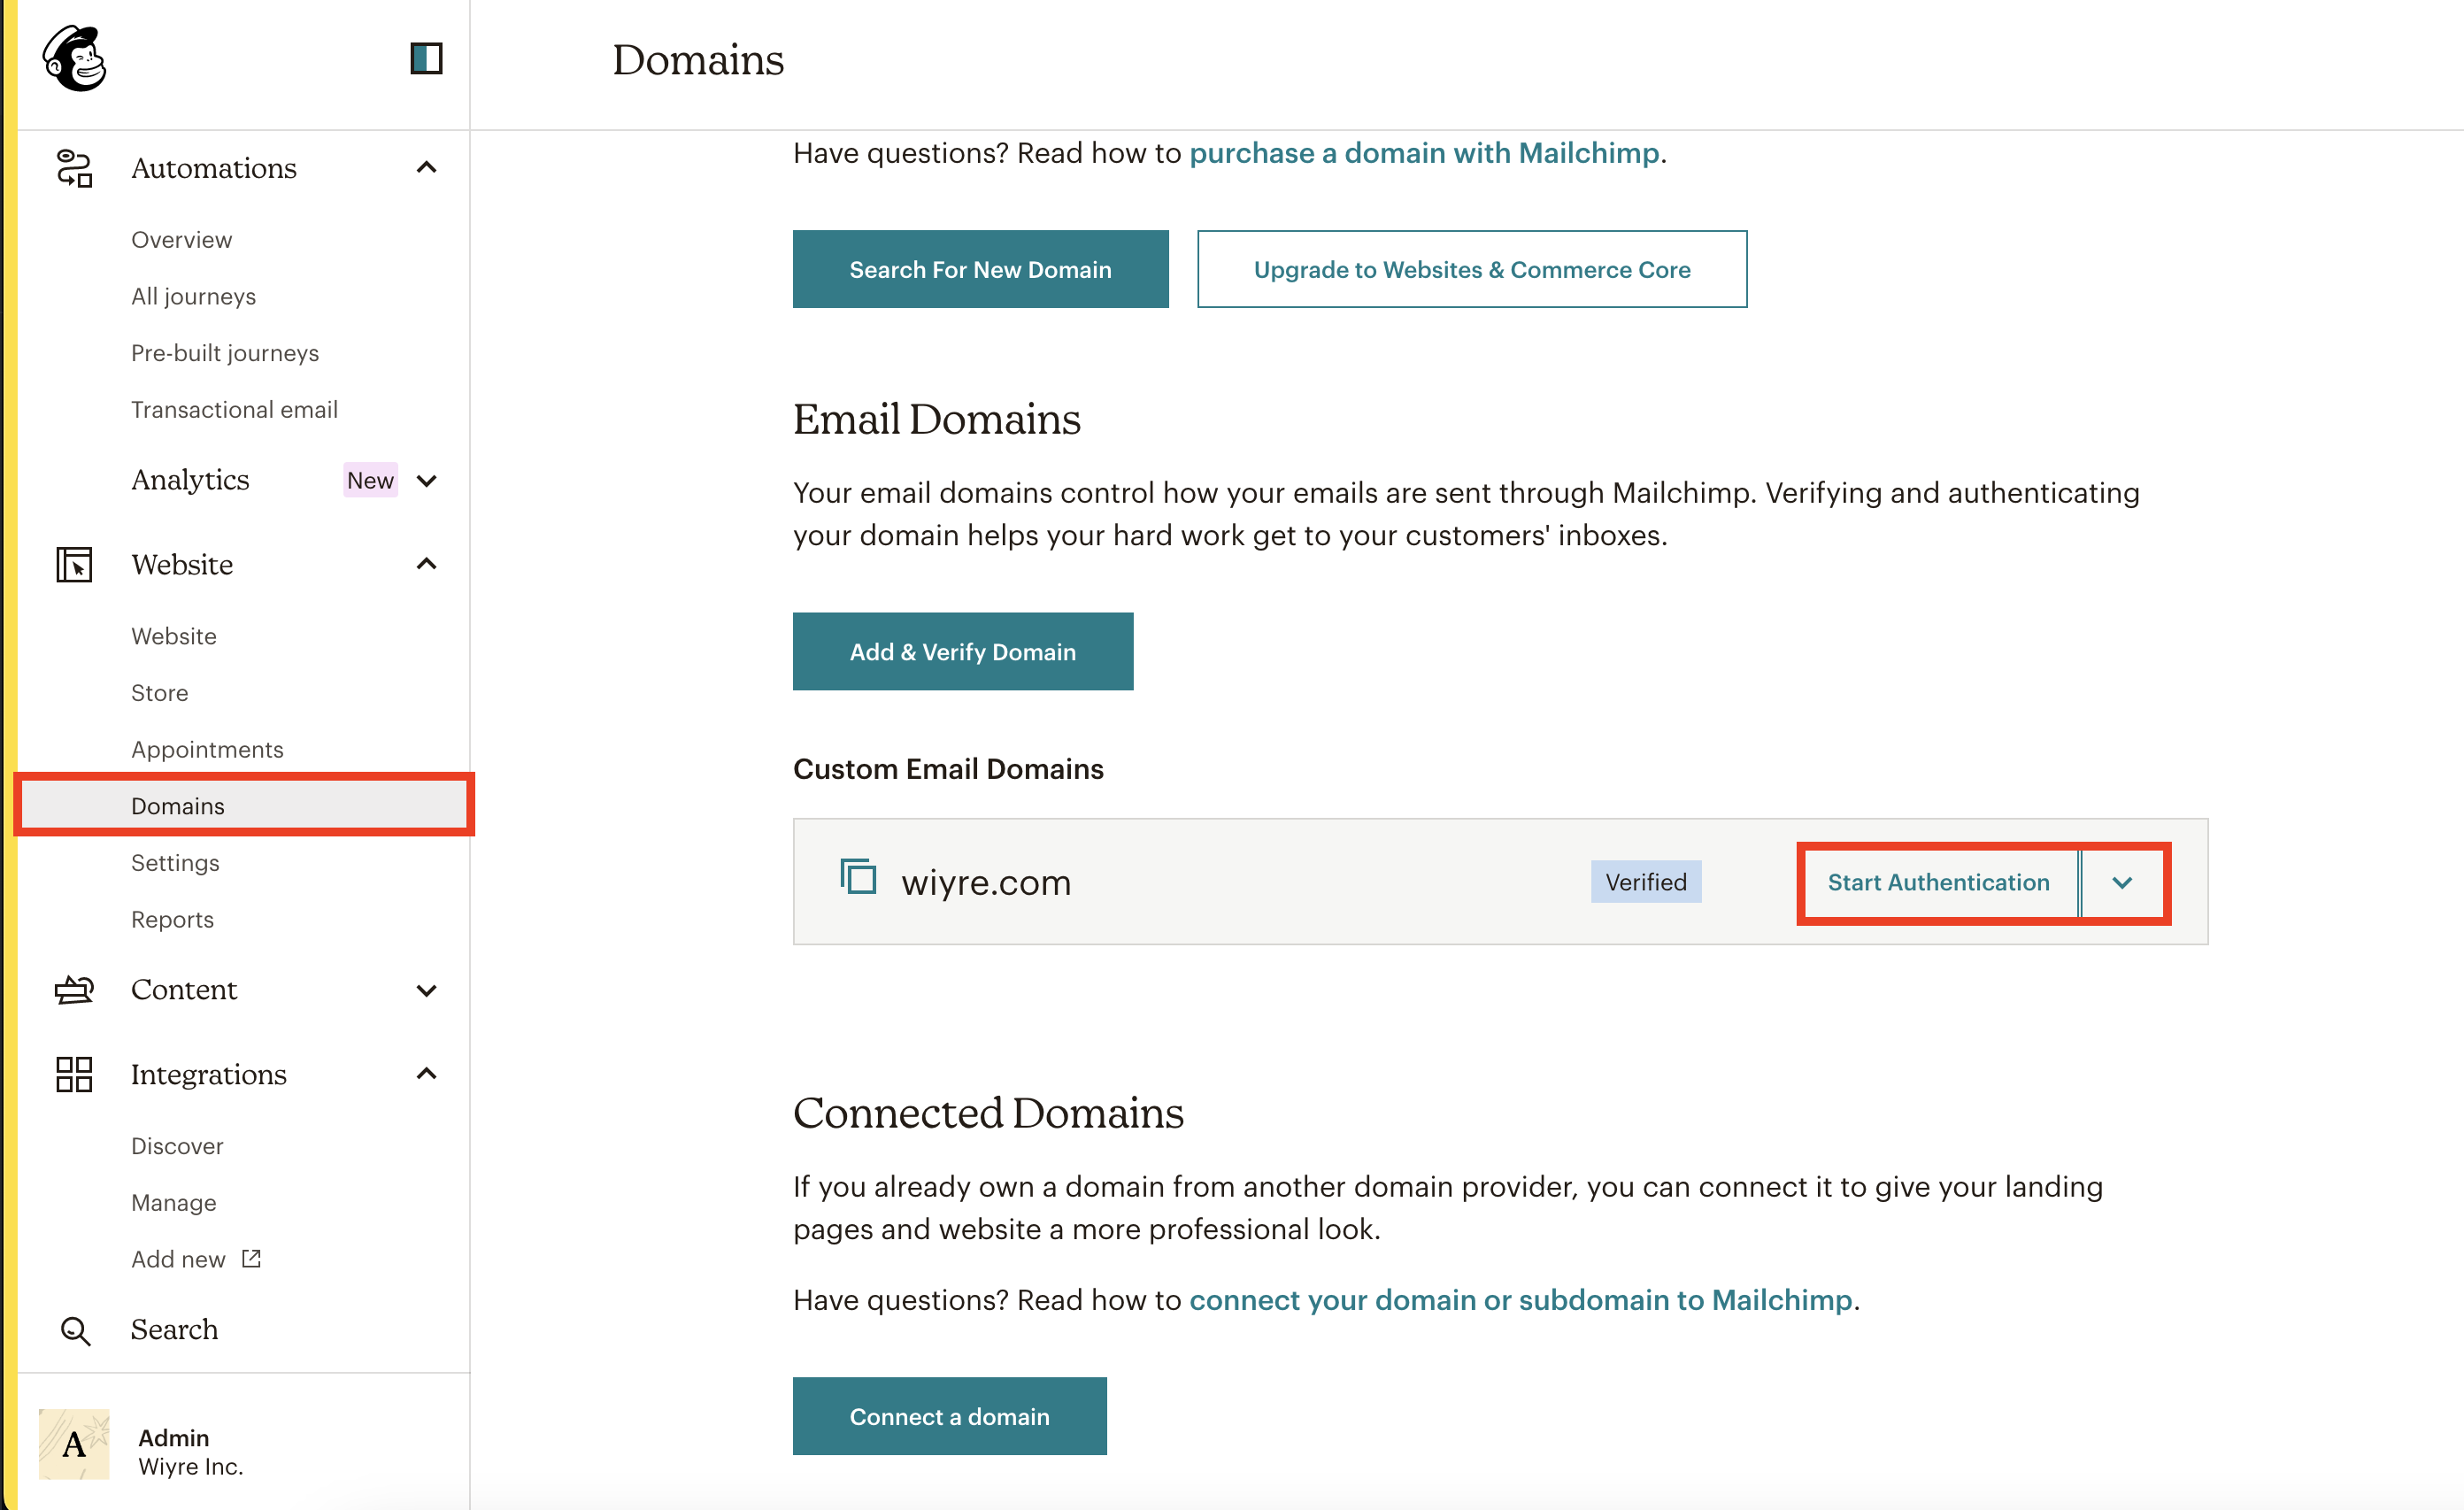
Login to your Mailchimp Account. To begin, you must already have a verified domain. Once your domain is verified, navigate to the “Domains” settings page under “Websites”. Click on “Start Authentication” to begin.

- Select your provider
Select your domain provider or registrar where you manage the DNS records for your domain. If you aren’t sure what service manages your DNS records, you can ask your web developer, or you can look up the domain details using a service like Whois by DomainTools. For this tutorial, we are going to choose the “Other” option.

- Add CNAME records to your DNS records
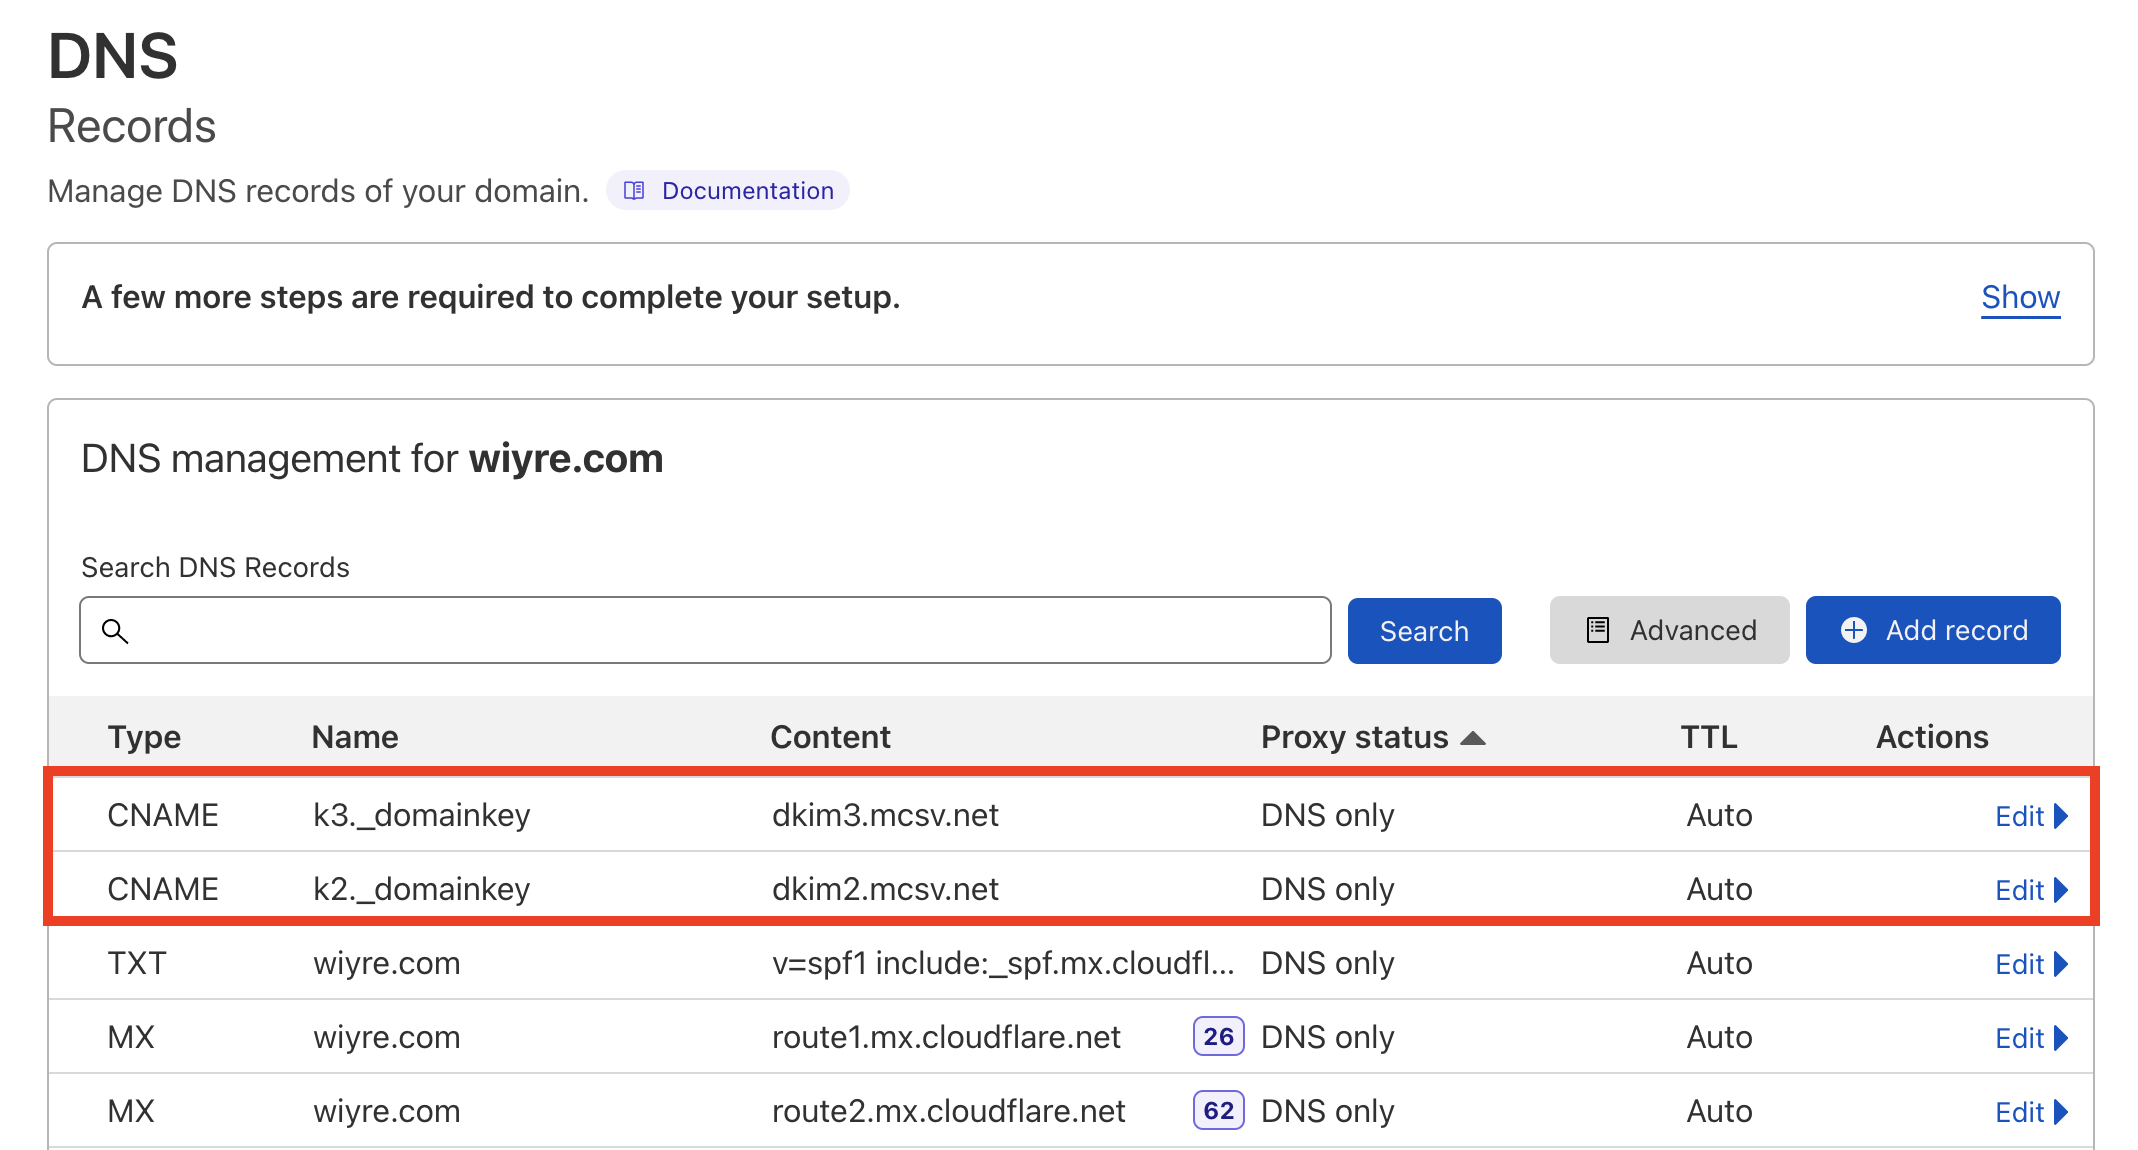
There are two CNAME records that need to be added. If you’re adding records using a CDN service like Cloudflare, make sure that you turn off “Proxy Status” so that you are not proxying these records through Cloudflare.
The two CNAME records should look something like this once you’ve finished:
- Wait for your Mailchimp to confirm your records are correct
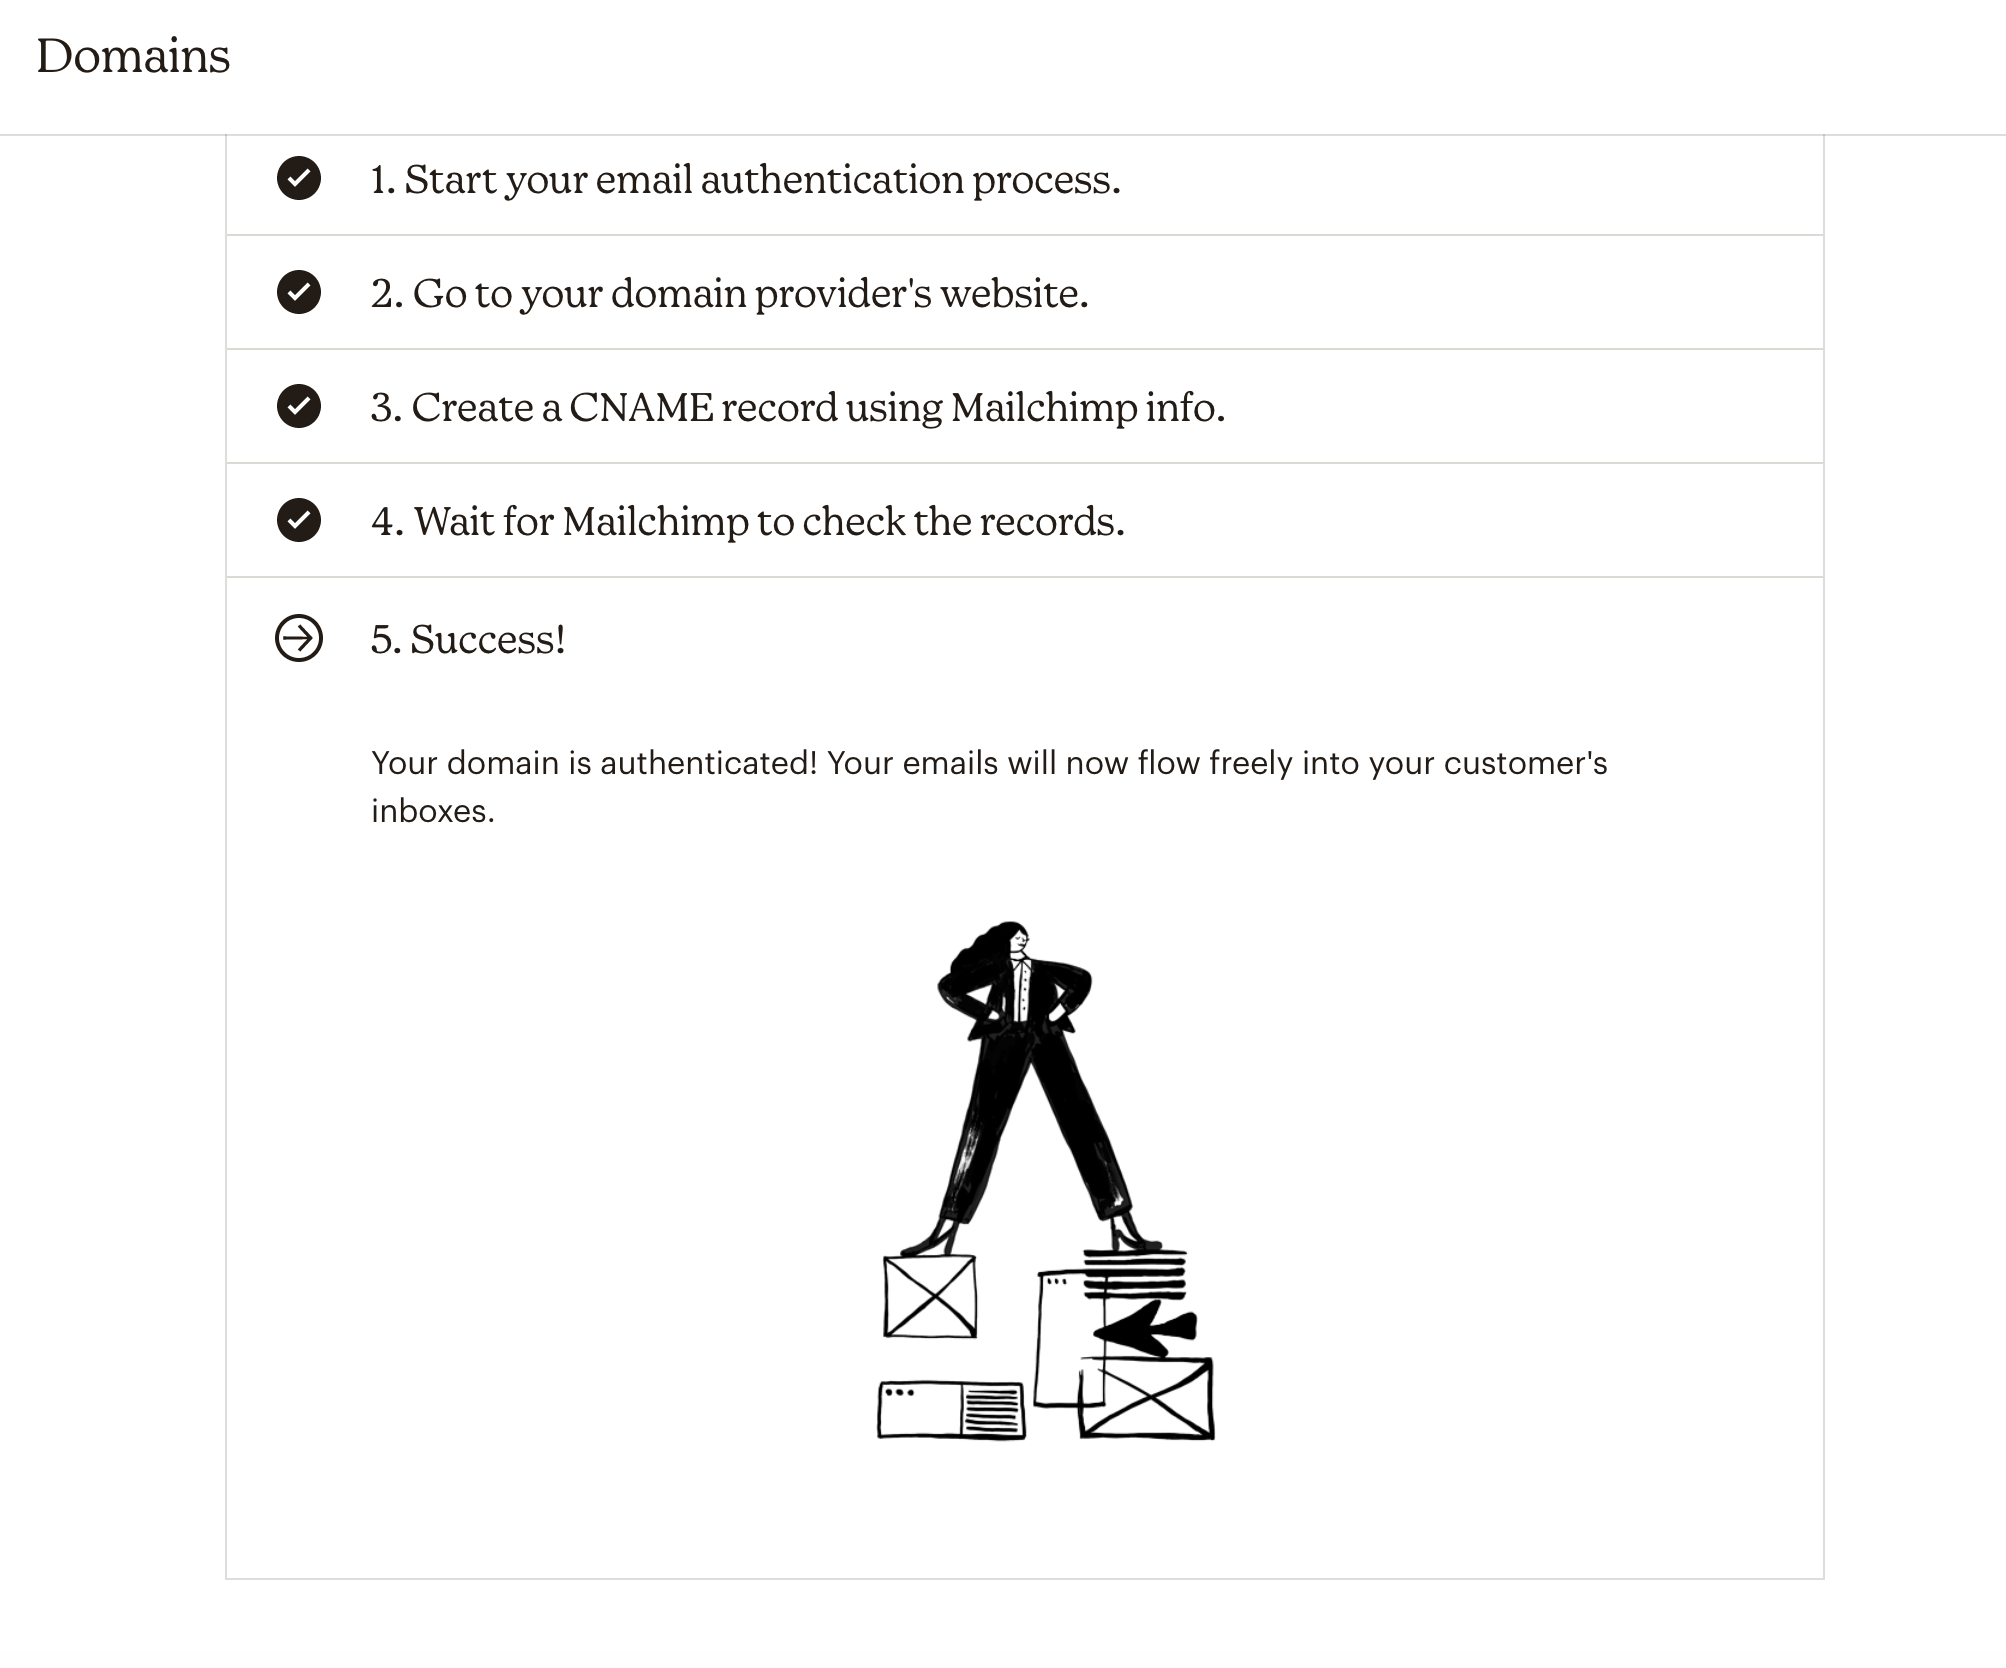
Once you’ve added the proper DNS records, you need to wait (up to 48 hours, but typically much faster) for Mailchimp to validate the DNS records you’ve added and authorize your domain. You’re all set! Once you authorize your domain successfully, it will look like this within your Mailchimp settings:

Does Mailchimp use DMARC?
DMARC (which is an abbreviation for Domain-based Message Authentication, Reporting & Conformance) is another type of email verification protocol that leverages the SPF and DKIM records to add an extra layer of verification for your emails, to confirm that an email is authentic.
If you’re already up and running with SPF and DKIM settings, you may be wondering if Mailchimp supports DMARC as well. Currently, Mailchimp does not have a custom DMARC configuration that you need to add to your DNS records, emails will be DMARC compliant as long as you have successfully configured SPF and DKIM settings on your domain associated with Mailchimp.

