DigitalOcean is a cloud computing company that gives you great control over the way your site operates, much more than traditional web hosts. With that said, there are a lot of advanced options included with DigitalOcean that will break your site if you’re not familiar with how it all works, so it’s important to make sure you set it up correctly to begin with. This guide assumes you are a complete beginner with no knowledge of DigitalOcean or the terminal window. Advanced users may find this guide unbearably thorough, but I wanted to make sure that anyone who knows how to use a computer could follow along and setup a WordPress website on DigitalOcean.
Step 1: Create your Droplet and choose your options
To begin, you must have a DigitalOcean account. If you do not have an account, you can click here to receive $10 in free DigitalOcean credit – eligible for first time users only. Once you’ve created your account and logged in, click on “Create Droplet” then select the “One-click apps” tab.
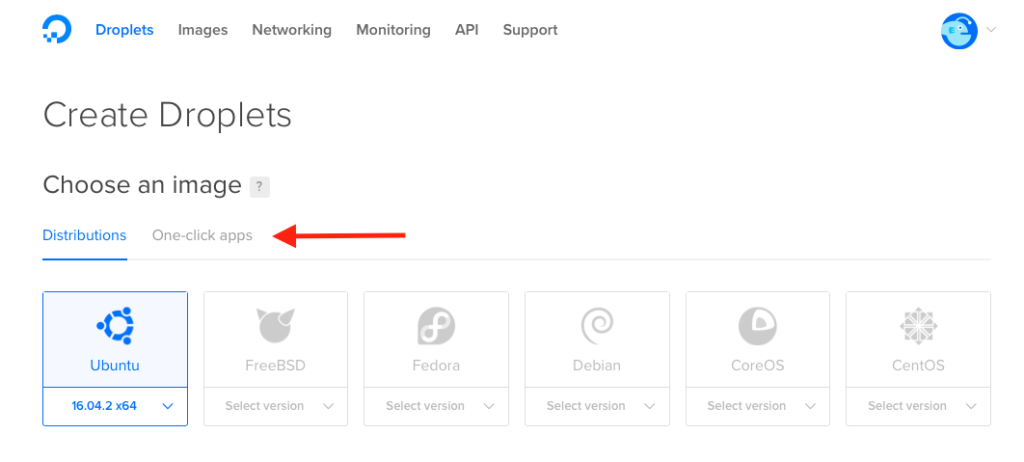
From the one-click apps tab, select the “Wordpress 4.8.3 on 16.04 (note: the WordPress version may have changed since writing this article, but you should only have one WordPress option on this page.)
- Choose a droplet size. The lowest possible option (usually the $10/mo one) will do for now. You can always increase your size later.
- Ignore block storage.
- Choose a datacenter region. This section doesn’t matter that much, but sometimes depending on what location you choose you might be charged more. I usually go with New York 1, 2, or 3.
- Select additional options if you want them (not necessary).
- Click on “Create”
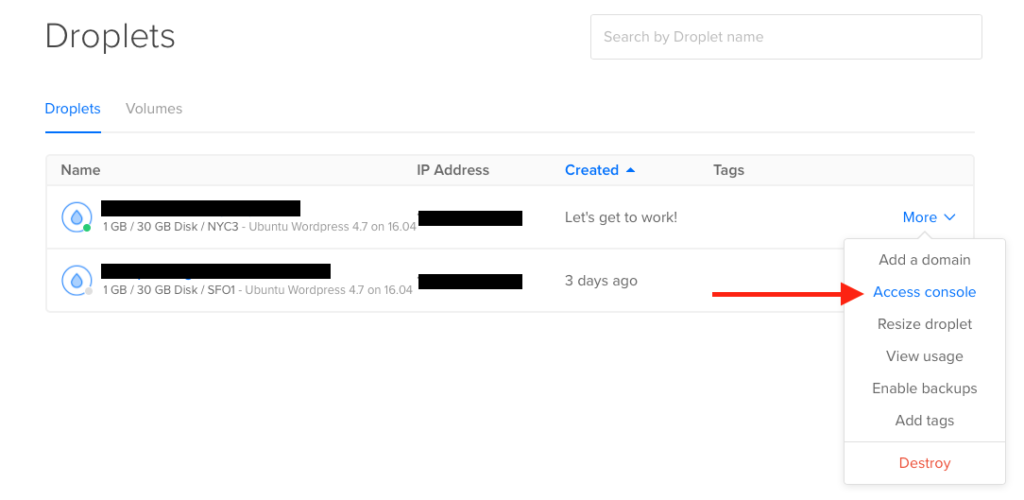
You’ll be taken to the droplet section. Click on the dropdown arrow next to the Droplet and click on “Access Console”
Step 2: Working with the console and modifying the root user
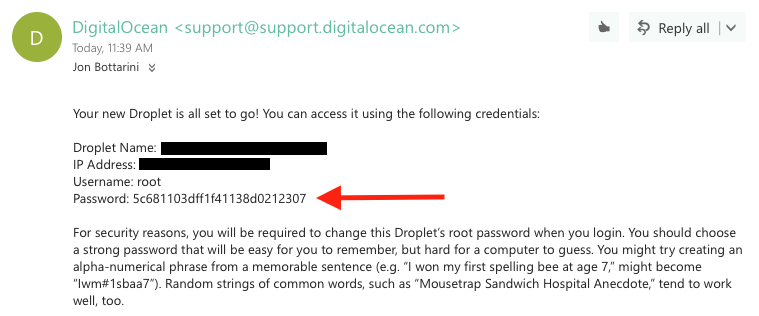
At this point the console will open up asking you to login to your Droplet. (In some situations, you’ll just see a blank black screen. Press any key and it should load up). Type in root – it will then ask for the password. The password is NOT your DigitalOcean password, it’s the password that was sent to your DigitalOcean email address when you created the new droplet. See the image below for the droplet root password and type it carefully into the terminal window.
[eckosc_status_message title=”It’s important to note…” icon=”fa-bookmark” type=”info” message=”You may not have any indication on the terminal window that you are typing the password – this is normal. Enter the password completely then press enter. The password field will stay “blank” the entire time. This is a normal occurrence when you’re entering password or other keys and such inside terminal.”]
If you entered the password correctly, the terminal will say:
You are required to change to change your password immediately (root enforced)
Changing password for root.
Enter the password from the email one more time, press enter, and then it will ask you to set a new password, twice. Remember this password.
[eckosc_status_message title=”” icon=”” type=”warn” message=”If you entered the password incorrectly when trying to authenticate as root, enter root as the username again and then enter the password. The password is very long, be sure to be very careful when typing it.”]
Once you’ve changed the root password, you can login to root on your own terminal application on your own computer and don’t need to login to DigitalOcean.com each time you want to access the terminal. You’ll want to do this because it will save you a ton of time in the future.
To connect to your DigitalOcean server on Mac, open Terminal (Command + SPACE key brings up the search function, type “Terminal” and then open the application.)
In terminal, you need to establish a connection to the DigitalOcean server. Type:
ssh root@<YOUR IP ADDRESS>
Then press the enter key
In the <YOUR IP ADDRESS> area, enter the IP address of the droplet you are connecting to. The IP address can be found next to the Droplet name when you login to DigitalOcean. You should write down this IP address because you will be referring back to it in the future.

The full ssh command should look something like this:
ssh [email protected]
The terminal window will tell you a warning saying that the authenticity cannot be established with the host you are trying to connect to – this is completely normal. Type yes to continue with the connection.

Once you type yes terminal will give you a warning saying the IP has been permanently added to the list of known hosts, and then will ask for your password (if it doesn’t, close terminal and retype ssh root@<YOUR IP ADDRESS> again and press enter)
This password is the new password you set when you changed the root password in Step 2.
When you enter it correctly, it will show a “message of the day” and it will display that you are logged in as root.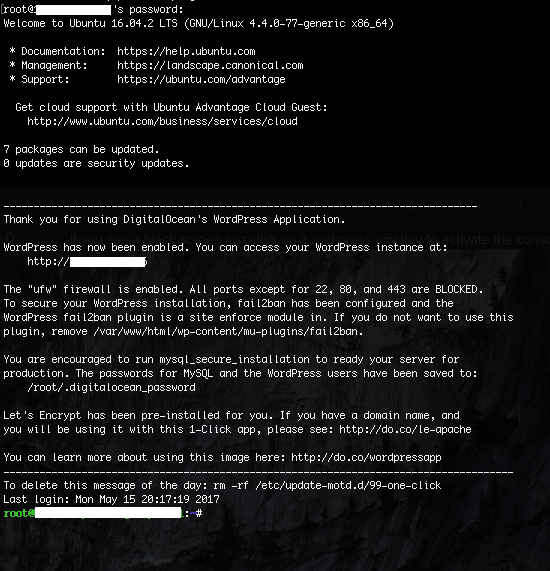
Alright, now that you’ve connected, let’s make you a user account so you aren’t using root anymore. You don’t really want to use the root account for anything… it’s too powerful for day to day stuff and it’s a much better idea to give yourself just the permissions you need on a new account.
Step 3: Creating a new admin user
(The following requires you to be logged in via ssh as you did in Step 2)
- Type
adduser NEWUSER(replacing NEWUSER with the name of the user you want to add) - It will ask you to enter a password and confirm the password (make it a strong password, this user will have a lot of permissions).
- You should receive a message stating the password has been updated successfully. Store this information securely as you will need to refer to it later.
- It will ask you to fill out information about the user, just fill out the full name section and press ENTER for the rest of the fields, they are all optional. Type
Yto confirm the information.
You’ve now created your new user. Let’s give it some privileges.
Type in terminal:
usermod -aG sudo NEWUSER
(replace NEWUSER with the username you just created)
Cool – now that user has sudo (think of it like admin) permissions, but this still isn’t enough. We need to explicitly allow this user to have full access to the /var/www folder within the server so the they can rename/delete/add files to the WordPress install. Let’s do that now:
- Logout of root. Do this by typing
logoutin terminal - Login to the account you just created:
ssh NEWUSER@<YOUR IP ADDRESS> - Enter the password for the user you created in Step 3
- Type in
sudo usermod -a -G www-data NEWUSER(Replace NEWUSER with the username of the user you just logged in as) - It might ask you for the [sudo] password – this is just your user account password
- Once you enter the command above, you should be able to login to your favorite FTP program
At this point you can download a FTP program like CyberDuck (free) or Transmit (free for 7 days, then $45) to navigate your WordPress server files. Alternatively, you can access you site at the IP address inside your browser. Let’s do that now.
Step 4: Setting Up WordPress
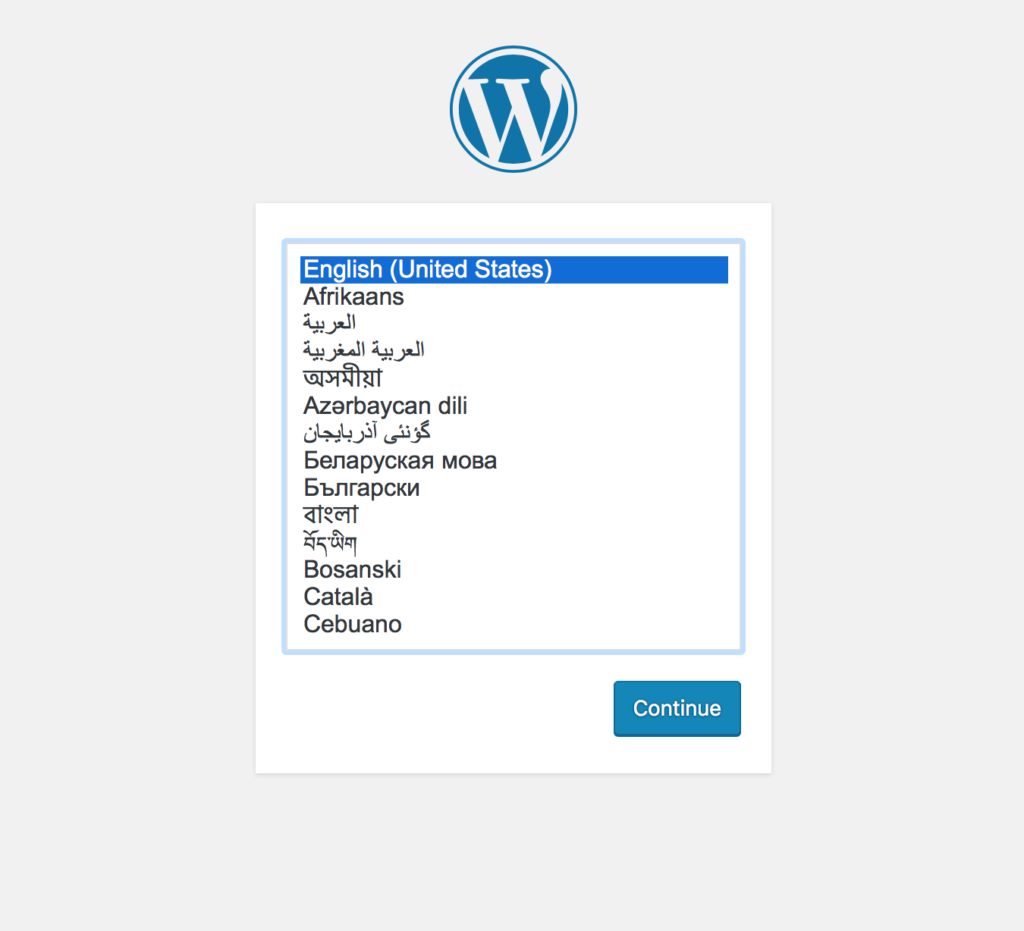
- Navigate to your browser and enter the IP address of your droplet. You should be greeted with a nice WordPress installation screen, like this:

- Select your language, then press continue.
- You’ll now be presented with a screen that allows you to fill out some information about your site. Enter a site title, then choose a username and password that you’ll use to login to the site itself. Enter your email.
- Now, if you want this site to be discovered by search engines like Google and Bing, you want to keep the
Discourage search engines from indexing this siteoption unchecked. - Once you save those options, you’ll be at a success page, you’re all done! Click on “Login Now” or navigate to http://YOURIPADDRESS/wp-admin/ – enter the username and password that you just created and you’ll be presented with the WordPress admin panel.
Congrats! You’ve successfully installed WordPress on DigitalOcean! 🎉


