

Google requires an ads.txt on each one of your websites that you want to run ads on. Having an Ads.txt (Authorized Digital Sellers) file is an important step to ensure transparency and prevent unauthorized ad inventory sales. By following a few simple steps, you can easily create an Ads.txt file and remove the warning from your AdSense account.
What is an Ads.txt file?
Ads.txt is an initiative developed by the Interactive Advertising Bureau (IAB) to combat ad fraud and improve transparency in programmatic advertising. It serves as a publicly available record that identifies authorized digital advertising sellers for a specific website. The ads.txt file lists the authorized sellers’ domain names and their respective Publisher IDs, enabling advertisers to verify the legitimacy of ad inventory.
How do I obtain my Ads.txt file?
The specific text that you need to include in your Ads.txt file is located in Google Adsense. Login to your account, click on “Sites”, then click on one of the sites in your account. Within this page, it will say “Ads.txt not found” and provide instructions on what to do with this file. This is what the page will look like:
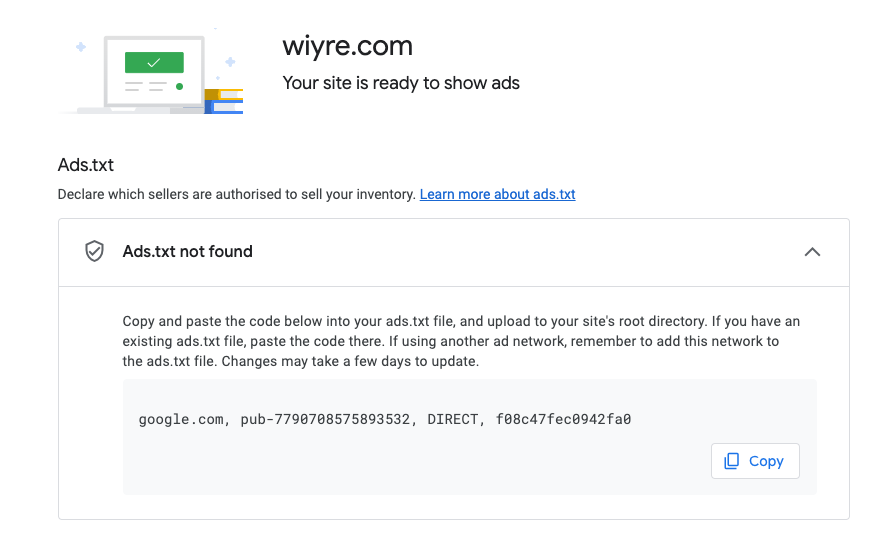
Simply copy this text, paste it into a plain text text editor, and save the file as “ads.txt”.
How to create/upload the Ads.txt file to WordPress
Once you have generated the ads.txt file, the next step is to upload it to your WordPress site. Login to your WordPress dashboard and navigate to the root directory of your website using an FTP client or the File Manager in your hosting control panel. Locate the folder containing your WordPress files, typically named “public_html” or “www.” Upload the ads.txt file to this folder. If you are not familiar with using FTP clients or File Managers, you can use a plugin to create and upload the file to your root directory instead.
Verify your Ads.txt File
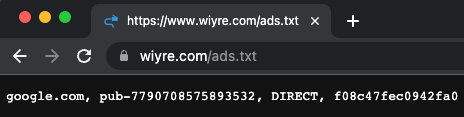
To ensure that your ads.txt file is properly implemented, it’s crucial to verify its functionality. You can do this by accessing your website’s URL followed by “/ads.txt” in a web browser (e.g., www.yourwebsite.com/ads.txt). If the file is configured correctly, you should be able to see its contents displayed on the webpage.
Adding an ads.txt file to your WordPress website is a simple yet effective way to protect your ad revenue by preventing unauthorized ad inventory sales. By following the steps outlined above, you can ensure transparency in programmatic advertising and maintain the integrity of your website’s ad ecosystem, while staying complaint with Google AdSense policies.
Frequently Asked Questions
Yes, if you are using multiple ad networks, simply add each network-specific ads.txt entry on a separate line line of your ads.txt file.